Watering
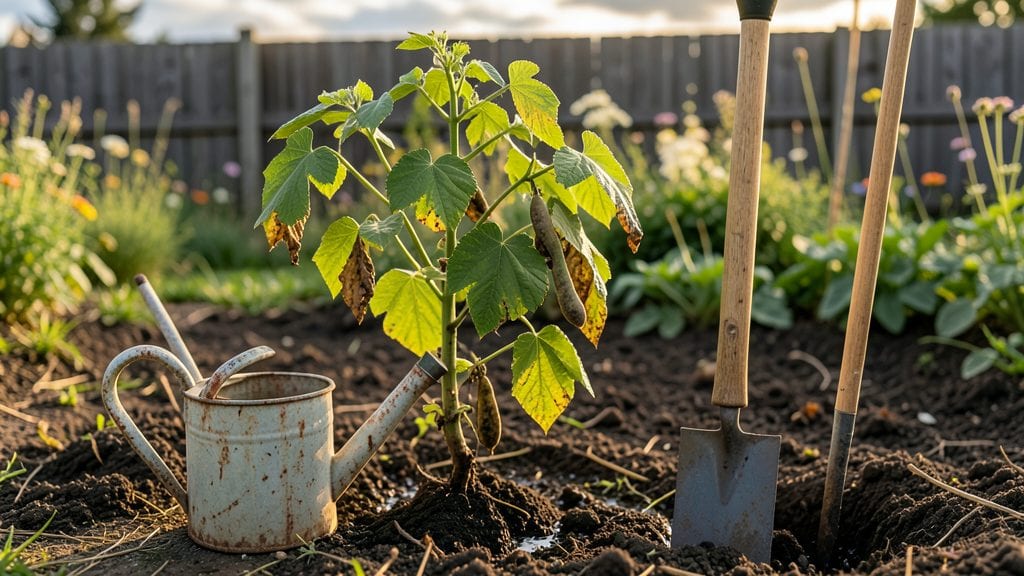
Overwatered bean plants can look like a death sentence—yellowing leaves, limp stems, and that sad, mushy soil—but I’ve brought mine back from the brink more times than I can count. The key isn’t panic; it’s acting fast with the right moves.
Most gardeners overdo it because beans seem thirsty, but they actually hate soggy roots. Within days, you can turn that droopy mess into a plant that’s thriving again.
First, stop watering entirely for 3-5 days to let the soil dry out. Then, check the roots—if they’re brown or smelly, trim the damaged parts and repot in fresh, well-draining soil mix. For outdoor plants, improve drainage by adding compost or sand to heavy soil.
Indoor growers? Make sure pots have drainage holes and use a lighter potting mix. The goal is to mimic how beans grow in their natural, well-drained habitats.
Once you’ve fixed the roots, adjust your watering habits. Beans need 1-1.5 inches of water per week, but they’re better off slightly dry than soggy. Stick your finger in the soil—if the top 1-2 inches feel damp, wait another day.
Mulching helps too, by keeping moisture steady without drowning the roots. Within 7-10 days, you’ll see new growth pushing through, and those wilted stems will stand tall again.
This works for both bush and pole beans, whether they’re in pots or the ground. The only difference? Pole beans need a little more frequent watering to keep vines from snapping, but the same rules apply.
Once you’ve got the rhythm down, your beans will reward you with heavy harvests all season—no more guesswork, just consistent care. Let’s get those plants back on track.
Root Causes Of Overwatering Issues
When your bean plants start looking sad—wilting, yellowing, or dropping leaves—chances are they’re getting too much love in the watering department. 💦 Overwatering isn’t just about pouring too much water; it’s a complex mix of environmental factors, soil conditions, and plant biology.
Let’s break down the key reasons this happens, so you can address the root (literally!) of the problem.
Beans need well-draining soil to thrive, but if water can’t escape easily, it pools around the roots, suffocating them. This is especially common in:
- Containers without drainage holes: Pots act like bathtubs—water sits instead of draining. Even "self-watering" pots can trap excess moisture if not monitored.
- Compacted or clay-heavy soil: Dense soils repel water, creating waterlogged "pockets" where roots can’t breathe. A simple soil test can reveal the issue.
- Mulch piled too high: While mulch conserves moisture, a thick layer (over 2–3 inches) can smother soil, trapping humidity and blocking airflow.
💡 Pro Tip: If your beans are in pots, elevate them on saucers or use a terracotta pot—its porous material helps evaporate excess moisture faster.
Beans hate "feast or famine" watering. Skipping a day one week but drowning them the next throws off their delicate balance. Here’s why:
- Frequent shallow watering: Light sprinkles keep the topsoil wet but leave roots dry. Beans develop shallow root systems, making them more sensitive to overwatering later.
- Ignoring weather changes: Rainy days + your usual watering schedule = double the moisture. Use a rain gauge or check soil moisture before watering.
- Automatic irrigation gone wild: Timers set on "always on" or miscalibrated sprinklers can turn your garden into a swamp overnight.
⏰ Actionable Fix: Water deeply but infrequently—aim for 1–1.5 inches of water per week (including rain), delivered in one session. Use your finger to check: if the top 2 inches of soil are dry, it’s time to water.
Beans aren’t tropical plants—they need a balance of airflow and sunlight. Too much humidity or too little light forces them to hold onto water, slowing evaporation and leading to rot.
| Factor | How It Causes Overwatering | Solution |
|---|---|---|
| High humidity (e.g., greenhouses, rainy climates) | Slow evaporation = water lingers in soil longer. | Increase airflow with fans or prune nearby plants to improve circulation. |
| Low light (e.g., shaded spots, indoor growing) | Plants photosynthesize less, so they don’t transpire (release water) efficiently. | Move beans to a sunny spot (6+ hours of light/day) or supplement with grow lights. |
🌡️ Quick Test: If condensation forms on leaves in the morning, your humidity is too high. Aim for 40–60% humidity for optimal bean health.
When roots are compromised—by fungi, bacteria, or pests—they can’t absorb water or oxygen properly. This forces the plant to overcompensate by taking in more water, which worsens the problem. Common culprits:
- Root rot (Phytophthora, Pythium): Fungal infections thrive in soggy soil, turning roots mushy and brown.
- Nematodes: Microscopic worms burrow into roots, creating entry points for water and disease.
- Aphids or spider mites: While they feed above ground, their damage stresses the plant, reducing its ability to regulate moisture.
🔍 Early Signs: Look for:
- Black, smelly roots (root rot).
- Stunted growth despite "wet" soil.
- Yellowing leaves with healthy green veins (classic nutrient block from poor roots).
✨ Prevention: Treat soil with neem oil or beneficial fungi (mycorrhizae) to boost root resilience. For existing issues, act fast—prune affected roots and repot in fresh, sterile soil.
Reviving Overwatered Bean Plants
If your bean plants are looking sad and soggy, don’t panic! With the right steps, you can nurse them back to health—even if they’ve been drowning in too much water. The key is acting fast, adjusting your care routine, and giving your plants the space they need to breathe.
Below, we’ll break down the solutions based on the root causes of overwatering, so you can target the problem and prevent it from happening again.
If your bean plants are sitting in waterlogged soil, their roots are suffocating and struggling to absorb oxygen. Here’s how to fix it:
🔥 Step 1: Stop Watering Immediately
- Pause all watering for at least 2–3 days to let the soil dry out. This gives the roots a chance to recover and prevents further rot.
🍳 Step 2: Improve Drainage
- Repot if needed: If the soil is compacted or lacks drainage, transfer your bean plants to a pot with drainage holes. Use a well-draining potting mix (like a blend of compost, perlite, and coconut coir) to help excess water escape.
- Add organic matter: Mix in compost or aged manure to improve soil structure and aeration. This helps roots access oxygen and prevents future waterlogging.
👨🍳 Step 3: Check Your Containers
- Avoid saucers or trays that trap water. If you’re using them, empty them after watering to prevent soggy roots.
- Raise pots off the ground (e.g., on bricks or a stand) to encourage airflow and faster evaporation.
🌱 Prevention Tip: Test Soil Moisture
- Stick your finger 1–2 inches into the soil before watering. If it’s damp, wait another day. Bean plants prefer slightly dry soil between waterings—think “damp, not soggy.”
Overwatering often causes leaves to turn yellow, wilt, or develop brown edges. Here’s how to revive them:
✨ Step 1: Trim Damaged Foliage
- Snip off yellow or mushy leaves with clean scissors to redirect the plant’s energy to healthy growth. Avoid cutting into healthy tissue.
💡 Step 2: Boost Air Circulation
- Space plants apart to improve airflow, reducing humidity around the leaves (which can encourage fungal issues).
- Use a small fan (on low) for 10–15 minutes daily to mimic wind and speed up drying.
🎯 Step 3: Adjust Humidity
- Move plants away from humid areas (like bathrooms or kitchens) if possible. Bean plants thrive in moderate humidity—aim for 40–60%.
🔥 Prevention Tip: Water in the Morning
- Watering early in the day gives leaves time to dry before evening, reducing the risk of fungal infections like powdery mildew.
If your bean plants have root rot (black, mushy roots or a foul smell), they need urgent care. Act fast to prevent total loss:
🔪 Step 1: Inspect the Roots
- Gently remove the plant from the soil and rinse the roots with water to assess damage.
- Healthy roots are firm and white; rotten roots are dark, slimy, or crumbly. Trim away the bad sections with sterilized scissors.
🌿 Step 2: Repot in Fresh Soil
- Use a clean pot and a sterilized potting mix (or a 50/50 blend of perlite and coconut coir).
- Add a fungicide (like neem oil or hydrogen peroxide solution) to the soil to prevent reinfection.
⏰ Step 3: Monitor Closely
- Water lightly for the next week, only when the top inch of soil is dry.
- Avoid fertilizing until new growth appears—roots need time to recover.
💡 Pro Tip: Hydrogen Peroxide Soak
- Soak the roots in a 3% hydrogen peroxide solution (1 part peroxide to 4 parts water) for 10 minutes before repotting to kill fungal spores.
Once your bean plants are back on track, follow these habits to keep them thriving:
- Water deeply but infrequently: Bean plants prefer 1–1.5 inches of water per week, delivered in one session rather than frequent light waterings.
- Use mulch: Apply a 1-inch layer of straw or shredded leaves around the base (but not touching the stem) to retain moisture and regulate soil temperature.
- Choose the right pot: Ensure containers have drainage holes and are the appropriate size—too large can hold excess moisture.
- Rotate plants: Give them a quarter turn every few days to ensure even sunlight exposure, which strengthens stems and reduces stress.
With these fixes, your bean plants should bounce back in 1–2 weeks, showing new growth and perky leaves. The key is patience and consistency—once you’ve adjusted their watering routine, they’ll reward you with lush foliage and maybe even a bountiful harvest! 🌱💚
Frequently asked questions about bean plant care
How do I know if my bean plants are overwatered instead of underwatered?
Check the soil first—if it’s constantly soggy or has a foul smell, that’s overwatering. Look for yellowing leaves with green veins (a classic overwatering sign) or wilted stems that feel mushy when squeezed. Underwatered plants usually have crispy, dry edges and soil that pulls away from the pot.
Can I save my bean plants if the roots are already rotting?
Yes, but act fast! Trim away all mushy, black roots with sterilized scissors, then repot in fresh, well-draining soil. Soak the remaining roots in a 3% hydrogen peroxide solution (1:4 ratio) for 10 minutes to kill fungi. Water lightly for the first week and avoid fertilizing until new growth appears.
Why do my bean plants wilt after watering instead of perking up?
This usually means your beans are overwatered or have root rot. When roots can’t absorb oxygen from soggy soil, they suffocate, causing wilting. Let the soil dry completely for 3–5 days, then repot in a mix with perlite or sand to improve drainage. Avoid watering until the top 1–2 inches of soil feel dry.
How often should I water bean plants in pots vs. garden beds?
Potted beans need watering every 2–3 days (check soil moisture first), while garden beans thrive with 1–1.5 inches of water per week. The key difference? Pots dry out faster. Always use containers with drainage holes and avoid saucers that trap excess water.
Will mulch help or hurt my bean plants if I’ve been overwatering?
Use mulch carefully—too much (over 2–3 inches) can trap moisture and worsen overwatering. For recovery, use a thin layer (1 inch) of straw or shredded leaves around the base (but not touching stems) to regulate soil temperature. Focus first on improving drainage before adding mulch.