Shrubs
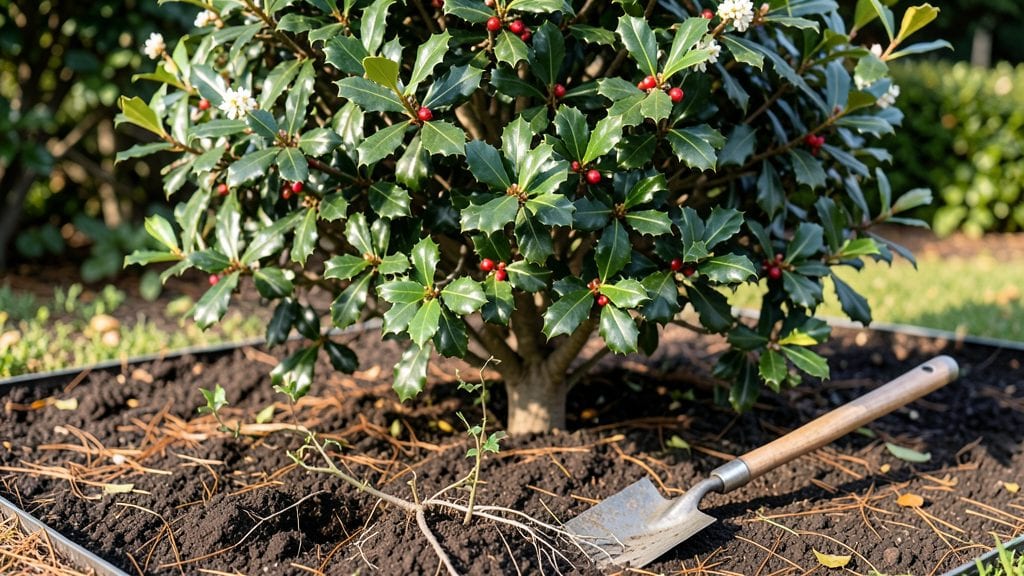
Planting evergreen bushes transforms your yard from a seasonal eyesore to a lush, green fortress that never sleeps. 🌿 I’ve planted these tough shrubs in every season—even in my first winter attempt—and learned the small details that make the difference between a thriving hedge and one that struggles.
The right species, soil prep, and placement turn what seems like a daunting project into something straightforward, even for beginners.
Most people overlook soil drainage and sunlight, but those two factors decide whether your bushes grow into a dense wall or a sad, scraggly line. You’ll need basic tools—a shovel, gloves, and a measuring tape—but the real secret is choosing bushes that match your climate.
A well-placed evergreen like arborvitae or boxwood stays vibrant year-round with minimal fuss, and the payoff is instant privacy that lasts through snowstorms and summer heat.
By the end of the planting process, you’ll have a neat row of bushes with roots settled deep enough to weather droughts and cold snaps. The first year requires a little extra watering, but after that, they’re basically set-and-forget.
Imagine waking up to a green backdrop that never fades—no more peeking neighbors or bare branches in winter. Here’s how to make it happen without the headaches.
This method works for any yard size, from tight urban plots to spacious backyards. Whether you’re lining a fence or creating a windbreak, the same principles apply. Let’s get those bushes in the ground the right way—once, and for good.
📚 In This Guide
- What you need
- Instructions
- Tips and common mistakes
- Wrapping up and next steps
What you need
- ● Evergreen bushes: Choose 3–5 mature plants (depending on desired height and spacing). Popular options include Holly (Ilex), Boxwood (Buxus), or Arborvitae (Thuja)—pick based on your climate zone!
- ● Shovel or trowel: A round-point shovel (for digging holes) and a hand trowel (for finer adjustments).
- ● Measuring tape: To mark planting spots with precision.
- ● Garden gloves: Heavy-duty or waterproof to protect your hands.
- ● Compost or organic mulch: A 5-gallon bag of high-quality compost (e.g., Miracle-Gro Garden Soil) and 2–3 cubic feet of mulch (pine bark or shredded wood).
- ● Watering can or hose: With a gentle spray nozzle for post-planting hydration.
- ○ Stakes and twine (optional but helpful): 4–6 wooden stakes (18–24 inches tall) and twine to support young bushes if needed.
- ● Soil amendment: A slow-release fertilizer (like Osmocote) to boost early growth.
- ● Planting grid or string: For ultra-straight rows—great for formal designs!
- ● Pruning shears: To trim ragged edges after planting.
- ● Knee pads: Because every gardener deserves comfort!
Step-by-Step instructions for planting evergreen bushes
Here’s how I plant evergreens for a lush, low-maintenance privacy screen that stays green all year.
🌱 Step 1: Choose the Right Location and Dig Holes
Pick a spot with 6+ hours of sunlight daily—evergreens thrive in full sun but tolerate partial shade. Mark your planting spots 6-10 feet apart, depending on the mature size of your bushes. For a 4-bush screen, space them evenly along a straight line.
Use a shovel to dig holes twice as wide and just as deep as the root ball. Loosen the soil at the bottom with your hands or a garden fork—this helps roots spread into the surrounding earth. If your soil is heavy clay, mix in a handful of compost at the bottom of each hole to improve drainage.
🪴 Step 2: Prepare the Bushes and Plant Them
Remove each bush from its container and gently loosen the roots if they’re circling tightly. This prevents root-bound stress later. Place the bush in the hole so the top of the root ball sits 1 inch above ground level—evergreens don’t like their roots buried too deep.
Fill the hole with soil, pressing lightly around the edges to remove air pockets. Water deeply right after planting to settle the soil and eliminate gaps. You’ll see the ground around the base sink slightly—this is normal and ensures good root contact.
☀️ Step 3: Mulch and Water Regularly
Spread 2-3 inches of mulch around each bush, keeping it 3 inches away from the trunk to prevent rot. I use shredded bark or pine straw—it keeps roots cool in summer and retains moisture. Mulch also blocks weeds, which compete for nutrients.
Water deeply once a week for the first month, then taper to every 2 weeks once established. Evergreens hate soggy roots but need consistent moisture. You’ll know they’re getting enough water when the soil feels damp 2 inches down—stick your finger in to check.
✂️ Step 4: Prune and Maintain for Long-Term Growth
Wait 6-12 months before pruning—you’ll see new growth at the tips of branches. Trim back any dead or crossing branches with clean, sharp shears. Shape lightly to encourage fullness, but avoid heavy pruning, which stresses evergreens.
Fertilize once a year in early spring with a slow-release, balanced fertilizer. I use a 10-10-10 mix for general growth. Watch for yellowing needles—this usually means too much fertilizer or poor drainage. Adjust watering or soil mix if you see this happen.
Tips & tricks for perfect evergreen bush planting
Here’s how to avoid common mistakes and ensure your evergreen bushes thrive from day one.
Sunlight and Spacing: That 6-10 foot spacing in Step 1 isn’t arbitrary—it accounts for mature bush size and airflow. If planting near a fence or wall, leave extra space since reflected heat can stress evergreens. I always mark planting spots with stakes before digging to maintain perfect alignment, especially for a 4-bush screen.
Root Ball Preparation: When loosening circling roots in Step 2, don’t go overboard—just separate them enough to encourage outward growth. I use my fingers to gently tease apart the roots, then place the bush so that 1 inch of root ball stays above ground. This prevents suffocation from buried roots while allowing proper drainage.
Mulching Wisdom: The 2-3 inches of mulch in Step 3 serves multiple purposes beyond weed control. It regulates soil temperature—critical in summer when roots can overheat. I always keep mulch 3 inches away from the trunk to prevent moisture buildup that causes rot. For extra protection, I top the mulch with a thin layer of pine needles in winter.
Watering Strategy: That once-a-week watering in Step 3 is a guideline, not a rule. Check soil moisture by sticking your finger 2 inches down—if it’s dry, water again. I use a soaker hose for deep watering, which delivers moisture directly to roots without wetting the needles. Overhead watering can lead to fungal issues, especially in humid climates.
Pro Tips for Planting Evergreen Bushes
- Here’s how to avoid common mistakes and ensure your evergreen bushes thrive from day one.
- Sunlight and Spacing: That 6-10 foot spacing in Step 1 isn’t arbitrary—it accounts for mature bush size and airflow. ...
- Root Ball Preparation: When loosening circling roots in Step 2, don’t go overboard—just separate them enough to encou...
Frequently asked questions
Got questions about planting evergreen bushes? You’re not alone! Here are some of the most common concerns—and their solutions—to help you create a lush, year-round privacy screen with confidence.
When is the best time to plant evergreen bushes?
The ideal window is early spring or fall when temperatures are mild (50–70°F). This gives roots time to establish before extreme heat or cold. Avoid planting in summer heatwaves or winter freezes—evergreens need consistent moisture and moderate stress to thrive.
How long does it take for evergreen bushes to grow into a privacy screen?
Most evergreens grow 6–12 inches per year, so a 6-foot-tall screen could take 5–10 years to fully mature. Fast-growing varieties like Leyland Cypress or Emerald Green Arborvitae may reach 3–4 feet in just 3–5 years. Patience pays off—dense foliage blocks noise and wind better over time!
Do evergreen bushes need special care after planting?
Yes! Water deeply 2–3 times per week for the first month (or daily in extreme heat), then taper to once a week once established. Mulch around the base (2–3 inches) to retain moisture, and avoid over-fertilizing—evergreens prefer balanced, slow-release fertilizer in early spring.
Can I plant evergreen bushes in clay soil or shady spots?
Evergreens are adaptable, but clay soil may need amendments (like compost or sand) to improve drainage. For shady spots, choose varieties like Inkberry Holly or Dwarf Alberta Spruce, which tolerate low light. Avoid planting in waterlogged areas—root rot is a common issue. Test your soil’s pH (most evergreens prefer acidic to neutral, 5.0–7.0).
What pests or diseases should I watch for with evergreen bushes?
Keep an eye out for spider mites, bagworms, or aphids (common pests) and root rot or fungal diseases in damp conditions. Prune affected branches promptly, and use neem oil or insecticidal soap for mild infestations. Healthy soil and proper spacing (3–6 feet apart) reduce disease risks.
Wrapping up and next steps
Planting evergreen bushes is a rewarding way to create a lush, private space that thrives all year long! 🌿 Whether you're a seasoned gardener or just starting out, these four simple steps make it easy to transform your outdoor area into a serene retreat.
Remember, the key is choosing the right plants for your climate, preparing the soil, and giving them the care they need to flourish.
Now that you’re armed with the know-how, roll up your sleeves and get planting! 🌱 Start small if you’re unsure—even a single well-placed bush can make a big difference. For extra inspiration, sketch a rough layout of your privacy screen before digging in. Happy gardening!