Transplanting
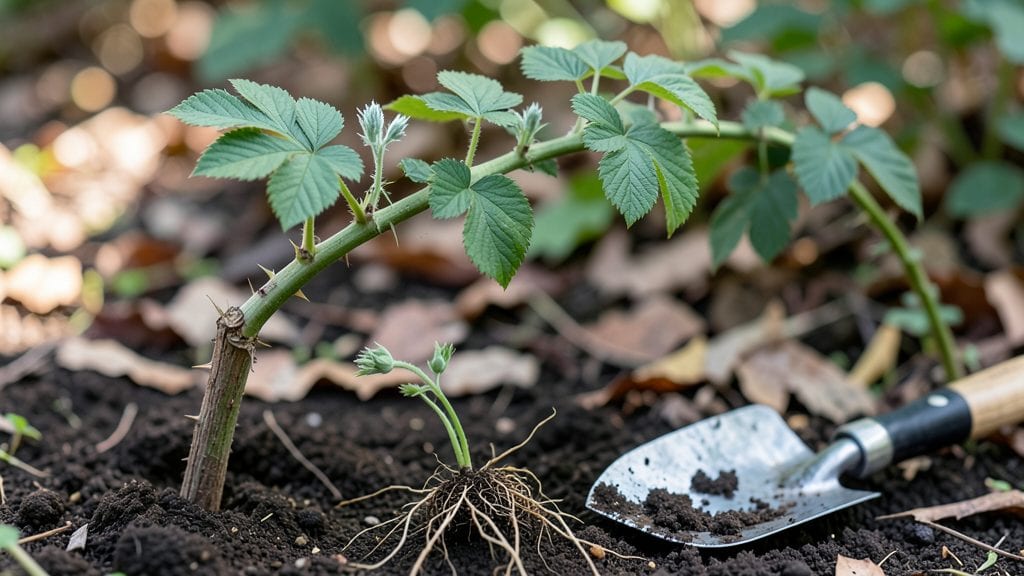
Planting raspberry canes right means year-round harvests—and I’ve learned the hard way that spacing and placement make all the difference. 🌱 After struggling with tangled canes and poor yields, I finally cracked the code: wide rows, deep soil, and the right trellis setup.
The secret isn’t just digging holes—it’s creating an environment where berries thrive and you can actually pick them without wrestling with the plants.
You’ll need a sunny spot with well-draining soil (test it first—raspberries hate soggy roots), bare-root canes or potted plants, and a sturdy trellis system. For primocanes (the fast-growing summer shoots) and floricanes (last year’s fruiting canes), spacing matters: 3–4 feet apart in rows 6–8 feet apart.
Plant canes 1–2 inches deep so the roots stay cool, and mulch heavily to keep weeds out and moisture in. This setup works for summer-bearing and fall-bearing varieties alike.
Within 6–8 weeks, you’ll see new growth shooting up the trellis, and by next season, those canes will be heavy with berries. The right spacing means easier harvesting, fewer pests sneaking in, and plants that live 5+ years with proper care.
No more tangled messes or missed fruit—just rows of ripe raspberries waiting for you.
Works in zones 3–9, though southern growers should focus on fall-bearing varieties to avoid winter dieback. Whether you’re starting a new patch or reviving an old one, these tricks cut down on frustration and up the harvest. Let’s get those canes in the ground!
📚 In This Guide
- What you need
- Instructions
- Tips and common mistakes
- Wrapping up and next steps
What you need
- ● Raspberry canes: 3–5 healthy, dormant canes per plant (bare-root or potted). Choose disease-resistant varieties like Boyne or Heritage for best results.
- ● Shovel or trowel: A sturdy digging tool (16–18" deep for bare-root canes).
- ● Garden gloves: Heavy-duty to protect against thorns and soil.
- ● Compost or well-aged manure: 2–3 gallons per planting hole (rich in organic matter).
- ● Balanced fertilizer (10-10-10 or similar): 1–2 tablespoons per hole to boost early growth.
- ● Mulch (straw, wood chips, or pine needles): 2–3 inches to retain moisture and suppress weeds.
- ● Drip irrigation or hose with nozzle: For consistent watering (raspberries love moisture!).
- ○ Plant ties or stakes (optional but helpful): 4–6 ft bamboo stakes or spiral ties to support canes.
- ● Soil test kit: Check pH (ideal: 5.5–6.5) and adjust with lime or sulfur if needed.
- ● Root stimulator: A dip for bare-root canes to encourage faster establishment.
- ● Row covers (frost cloth): For early planting in cold climates.
- ● Pruning shears: For trimming dead canes post-planting.
- ● Weed barrier fabric: To reduce competition for nutrients.
Step-by-Step instructions for planting raspberry canes
Here's the foolproof method I've used to establish thriving raspberry patches that bear fruit reliably for years.
🌱 Step 1: Choose the Right Location and Prepare the Soil
Raspberries demand full sun—at least 6-8 hours daily—and well-draining soil with a pH between 5.5-6.5. I always test my soil first; if it's too acidic, I amend with lime. The spot should have 2-3 feet of space between rows to prevent disease spread and allow air circulation.
Clear the area of weeds and grass, then loosen the soil to a depth of 12 inches using a broadfork. Work in 2-3 inches of compost or well-rotted manure to enrich the soil without compacting it. Raspberries hate soggy roots, so if your soil drains poorly, raise beds or plant on a slope.
🪴 Step 2: Plant Canes at the Correct Depth and Spacing
For 4 plants, dig holes 12-18 inches apart along the prepared row, spacing rows 6 feet apart for summer-bearing varieties or 4 feet apart for fall-bearing types. Plant canes 2 inches deeper than they were in their container—this encourages strong root development below the soil line.
Remove canes from their containers and untangle roots gently. Place each cane in its hole so the top bud is just below the soil surface. Backfill with soil, firming lightly around the base to eliminate air pockets. Water deeply to settle the soil and remove any remaining air gaps.
☀️ Step 3: Mulch and Provide Initial Care
Spread 3 inches of organic mulch around each plant, keeping it 2-3 inches away from the stem to prevent rot. I use straw or shredded leaves because they break down slowly and retain moisture. Water immediately after planting to help roots establish, then maintain 1 inch of water per week during dry spells.
Prune back the canes to 6 inches tall after planting to redirect energy into root growth. This might seem drastic, but you'll see thicker, more vigorous canes next spring. Avoid fertilizing at planting—wait until new growth appears in spring to apply a balanced fertilizer.
✂️ Step 4: Prune and Train Canes for Maximum Yield
In late winter or early spring, cut all old canes down to the ground—they've fruited and won't produce again. For summer-bearing varieties, new canes (primocanes) will emerge; these won't fruit this year but will form next season's fruiting canes (floricanes). For fall-bearing types, you'll see fruit on both primocanes and floricanes.
Train canes to a trellis or wire support as they grow to improve air flow and make harvesting easier. Remove any canes growing outside the row or touching the ground. You'll know you're doing it right when canes are spaced evenly and show bright green, healthy leaves without yellowing.
⏰ Step 5: Maintain Through the Growing Season
Water consistently during fruit set and ripening—1-1.5 inches per week—to prevent splitting berries. I check soil moisture by feeling the top inch; if it's dry, it's time to water. Fertilize in early spring and again after harvest with a high-phosphorus fertilizer to encourage fruiting.
Watch for pests like spider mites and diseases like cane blight. Remove and destroy any infected canes immediately. By late fall, cut back all canes to 1 foot tall and cover the bed with 6 inches of mulch to protect roots from freezing. This winter prep ensures stronger growth and bigger harvests next year.
Tips & tricks for perfect raspberry planting
Between us, these spacing and care tricks are what separate a struggling raspberry patch from a bountiful harvest that keeps giving year after year.
The Spacing Secret: That 6-8 hours of sunlight in Step 1 isn't just about light—it's about creating a microclimate where air circulates properly between your 4 plants spaced 12-18 inches apart. I've seen beginners crowd canes too close, and within two years, they're fighting fungal diseases because the center stays damp. Think of it like a forest canopy—you want sunlight to reach all the way to the ground, not just the outer plants.
Root Depth Matters: Planting canes 2 inches deeper than their container height in Step 2 might seem counterintuitive, but this buried section becomes the powerhouse for next year's growth. I learned this the hard way after planting at the same depth as the container—my canes produced beautifully the first year but struggled to recover after winter. The deeper roots act like an anchor, pulling nutrients from lower soil layers where they're more stable.
Mulch Like a Pro: That 3 inches of organic mulch in Step 3 isn't just for looks—it's a living system. Straw breaks down slowly, releasing nutrients while maintaining consistent moisture. Here's what nobody tells you: Refresh your mulch every fall before winterizing. Old mulch compacts and can smother new growth in spring. I keep a dedicated bale of straw just for this purpose, and it's made the difference between decent harvests and truly spectacular ones.
Winter Prep is Critical: Don't skip cutting canes back to 1 foot tall in late fall (Step 5). This might seem harsh, but it's nature's way of forcing energy into root development rather than maintaining above-ground growth. I've seen gardeners leave canes too tall over winter, and they come back with weaker stems that snap under fruit weight. Think of it as giving your raspberries a haircut before hibernation—it might look drastic, but they'll thank you with stronger growth next spring.
Pro Tips for Planting Raspberry Canes
- Between us, these spacing and care tricks are what separate a struggling raspberry patch from a bountiful harvest tha...
- The Spacing Secret: That 6-8 hours of sunlight in Step 1 isn't just about light—it's about creating a microclimate wh...
- Root Depth Matters: Planting canes 2 inches deeper than their container height in Step 2 might seem counterintuitive,...
Frequently asked questions
Got questions about planting raspberry canes? You’re not alone! Here are some of the most common queries—plus straightforward answers to help you grow like a pro.
When is the best time to plant raspberry canes?
Plant raspberry canes in early spring (as soon as the soil is workable) or late fall (before the first hard frost). This gives roots time to establish before extreme temperatures. Avoid planting in summer heat, which can stress young canes. For bare-root canes, plant as soon as they arrive!
How long does it take for raspberry canes to produce fruit?
Most raspberry varieties take 1–2 years to bear fruit after planting. Primocanes (first-year canes) won’t produce, but floricane types (like Heritage) may yield small crops in their second year. Patience pays off—healthy canes reward you with bigger harvests in years 3–5!
What’s the ideal spacing for raspberry canes?
Space canes 18–24 inches apart in rows 6–8 feet apart for good airflow and sunlight. Trellising? Use 3–4 feet of vertical space per row. Overcrowding leads to disease and poor fruit quality. Pro tip: Leave extra room for summer-floricane types (like Boyne Gold) to sprawl!
Why are my raspberry canes dying after planting?
Common culprits: overwatering (roots need drainage!), poor soil (amend with compost), or pests (like Japanese beetles). Check for yellowing leaves (nutrient deficiency) or wilted canes (root rot). Mulch with straw to retain moisture and deter weeds— keep soil temps steady!
Can I grow raspberries in containers?
Yes! Dwarf varieties (like Heritage or Heritage Improved) thrive in 5-gallon pots with well-draining soil. Use a trellis or wire cage for support. Containers dry out faster—water deeply 2–3 times weekly in hot climates. Just ensure pots get 6+ hours of sunlight daily for best yields.
Wrapping up and next steps
Planting raspberry canes is a rewarding way to enjoy a bountiful harvest year after year!
With the right spacing, soil prep, and care, you’ll set your berry patch up for success—whether you’re a beginner or a seasoned gardener. 🌱 The key takeaway? Plan ahead, prioritize airflow, and give those canes room to thrive.
Now that you’re armed with tips and tricks, it’s time to roll up your sleeves and get planting! Start small if you’re new, and don’t forget to label your varieties for easy tracking. Happy gardening—your future raspberry feasts are just canes away! 🍓