Planting
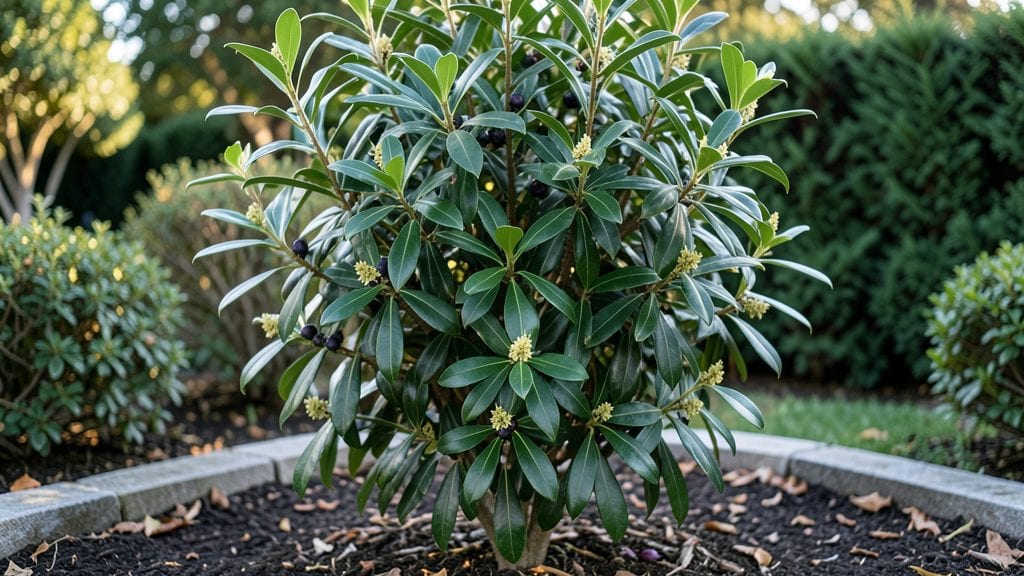
Planting a bay tree means adding a fragrant, evergreen centerpiece that works as hard as it looks—whether you want a privacy screen or a kitchen-side pot. ✨ I’ve grown mine for years, and it’s become the backbone of my garden’s year-round structure, with glossy leaves that smell amazing when brushed.
The best part? It thrives outdoors in warm climates or indoors near a sunny window, making it the ultimate dual-purpose plant.
Bay trees love full sun but tolerate partial shade, and they’re not picky about soil as long as it drains well. A well-draining mix with compost works wonders, whether you’re planting in the ground or a container.
Water deeply when the top inch of soil feels dry, but avoid soggy roots—this is where most beginners go wrong. With the right spot and care, your bay tree will grow steadily, reaching heights of 10 to 20 feet outdoors or staying compact indoors with pruning.
You’ll harvest fresh leaves for cooking anytime, and the tree’s dense, glossy foliage creates a lush privacy screen that never loses its appeal. Prune lightly in late winter to shape it and encourage bushier growth, and watch as it becomes the star of your garden or kitchen.
The scent alone makes it worth the effort, but the versatility is what truly sets it apart.
Works equally well as a standalone specimen, a hedge, or even a container plant on a patio. Whether you’re growing it for flavor, fragrance, or foliage, this evergreen delivers all year long with minimal fuss. Ready to plant yours?
📚 In This Guide
- What you need
- Instructions
- Tips and common mistakes
- Wrapping up and next steps
What you need
- ● Bay Tree Plant: 1–3 nursery-grown Laurus nobilis saplings (3–6 ft tall for faster privacy)
- ● OR bay tree seeds (if starting from scratch—germination takes 4–6 weeks!)
- ● Planting Site: Sunny to partially shaded area (6+ hours of sunlight daily for best growth)
- ● Well-draining soil (amend with compost if your soil is heavy or clay-heavy)
- ● Space: 6–10 ft apart for single-row hedges; 4–6 ft for denser screens
- ● Tools: Garden trowel or spade
- ● Measuring tape (for spacing)
- ● Gloves (to protect your hands from thorns)
- ● Watering can or hose with a gentle spray nozzle
- ● Soil Amendments: Compost or well-rotted manure (1–2 gallons per plant)
- ● Slow-release fertilizer (balanced 10-10-10 or organic options like fish emulsion)
- ● Mulch: 2–3 inches of organic mulch (pine straw, wood chips) to retain moisture
- ● Pruning Tools: Bypass pruners (for shaping) and loppers (for thicker branches)
- ● Stakes & Twine: If planting in windy areas (bay trees can grow tall!)
- ● Pest Control: Neem oil or insecticidal soap (preemptive measure for aphids or spider mites)
Step-by-step guide to planting bay trees for a lush privacy screen
Here's how to create a dense, fragrant privacy screen that thrives year-round.
🌱 Step 1: Choose the Right Location and Prepare the Soil
Bay trees adore full sun, so pick a spot that gets at least 6 hours of direct sunlight daily. I always check the site in late afternoon when shadows are longest—this helps me visualize how the tree will grow. Avoid low spots where water pools, as bay trees hate soggy roots.
Before planting, loosen the soil to a depth of 12 inches using a garden fork. Work in 2 inches of compost to improve drainage and fertility. Bay trees prefer well-draining soil, so if your area has heavy clay, mix in 1 part sand for every 3 parts soil. The goal is loose, crumbly soil that won't compact around the roots.
🪴 Step 2: Dig the Hole and Plant at the Right Depth
Dig a hole that's twice as wide as the root ball but no deeper. This encourages roots to spread outward rather than settling into a deep, compacted pit. Gently remove the tree from its container and tease the roots outward if they're circling—this prevents girdling as the tree matures.
Place the tree in the hole so the top of the root ball sits 1 inch above ground level. Bay trees often settle over time, so I never bury the trunk too deeply. Fill the hole with native soil, pressing lightly to eliminate air pockets. Water deeply to help settle the soil around the roots, then add a 2-inch layer of mulch around the base, keeping it 6 inches away from the trunk.
☀️ Step 3: Water and Monitor for the First Critical Month
Water your bay tree deeply once a week for the first month, ensuring the soil stays moist but not waterlogged. You'll know it's time to water when the top 2 inches of soil feel dry to the touch. Overwatering is the biggest mistake—bay trees are drought-tolerant once established but hate wet feet.
During this period, I check the leaves daily for signs of stress. Healthy bay trees have dark green, glossy foliage. If you see yellowing leaves, it’s usually a sign of overwatering or poor drainage. If the edges brown, the air is too dry—consider misting the leaves occasionally or placing a humidity tray nearby.
✂️ Step 4: Prune for Shape and Encourage Bushiness
Prune your bay tree in early spring before new growth begins. I always use clean, sharp pruners to make cuts just above a leaf node. Remove any dead, diseased, or crossing branches first. Then, trim back any leggy growth to encourage a fuller shape—bay trees respond well to pruning and will fill in quickly.
For a privacy screen, aim for a rounded, bushy shape. I like to trim the outer branches by about one-third each year to maintain density. Never prune more than 30% of the tree in one season, or you risk stressing it. Wear gloves when handling bay leaves—they can irritate sensitive skin, and the oils leave a strong scent on clothing.
🌿 Step 5: Fertilize and Maintain for Long-Term Growth
Feed your bay tree in early spring with a balanced, slow-release fertilizer (10-10-10 works well). Sprinkle the granules evenly over the root zone and water deeply to activate them. Bay trees aren’t heavy feeders, so I avoid over-fertilizing—too much nitrogen leads to lush foliage but weak growth.
Once your bay trees are established (after about 2 years), they require minimal care. Continue pruning annually to maintain shape and remove any suckers that grow at the base. Bay trees are evergreen, so they’ll provide year-round privacy, but they grow slowly—plan for 12-18 inches of growth per year. Patience pays off with a fragrant, dense screen that lasts for decades.
Tips & tricks for perfect bay tree planting
Here's what I've learned over years of growing fragrant bay tree privacy screens that actually thrive.
Sunlight Secret: That 6 hours of daily sun is non-negotiable for healthy bay trees. I test locations by checking shadows at their longest point in the afternoon—this reveals how much light the spot truly gets. If you're planting near buildings or other trees, space them at least 10 feet apart to prevent shading, which can weaken growth and reduce foliage density over time.
Root Ball Rescue: When teasing out circling roots in Step 2, don't force them—just gently separate them with your fingers. I've seen people cut roots trying to fix this, which actually stresses the tree more. The goal is to encourage outward growth, not damage the root system. This simple step makes all the difference in establishing strong root systems that support your privacy screen.
Mulching Wisdom: That 2-inch layer of mulch serves two critical purposes: it retains moisture and regulates soil temperature. I always keep it 6 inches away from the trunk to prevent rot. For extra protection in hot climates, consider using a light-colored mulch like straw—it reflects sunlight and keeps roots cooler than dark mulches. Replenish it annually as it breaks down.
Pruning Precision: When you're trimming those outer branches by one-third each year, focus on the outer third of the tree's height, not just the tips. This creates that lush, rounded shape while maintaining airflow through the center. I mark my cuts with a pencil before snipping to visualize the final shape—it makes the process much more intentional and effective for privacy screens.
Pro Tips for Bay Tree Plant
- Here's what I've learned over years of growing fragrant bay tree privacy screens that actually thrive.
- Sunlight Secret: That 6 hours of daily sun is non-negotiable for healthy bay trees.
- Root Ball Rescue: When teasing out circling roots in Step 2, don't force them—just gently separate them with your fingers.
Frequently asked questions
How fast does a bay tree grow, and when can I expect privacy?
A mature bay tree grows about 12–24 inches per year under ideal conditions. For a dense privacy screen, expect 3–5 years of growth before it reaches full height (typically 15–25 feet). Planting multiple trees in a staggered row speeds up the process!
Are bay trees frost-tolerant? What if my area gets cold winters?
Bay trees are moderately cold-hardy (USDA Zones 7–10). In colder climates, protect young trees with mulch or burlap wraps during frost. Mature trees may lose leaves in winter but bounce back in spring. Choose Laurus nobilis varieties like 'Angustifolia' for better cold resistance.
How often should I water a bay tree, especially in hot weather?
Bay trees prefer consistently moist (not soggy) soil. Water deeply 1–2 times per week in hot/dry climates, and reduce to weekly in cooler months. Overwatering causes root rot—always check soil moisture 2 inches below the surface before watering.
Can I grow a bay tree in a container? What’s the best pot size?
Yes! Bay trees thrive in containers if given enough space. Use a 15–20 gallon pot (minimum 2 feet deep) with drainage holes. Repot every 2–3 years and prune roots if they circle. Place in full sun to partial shade and fertilize monthly during growing season.
Why are my bay tree leaves turning yellow or dropping? Is it normal?
Yellowing leaves often signal overwatering, nutrient deficiency, or pests. Check for:
- Brown edges = Underwatering or low humidity.
- Yellow patches = Fungal issues (treat with neem oil).
- Dropping leaves = Stress from transplant shock or extreme temps.
What’s a good alternative if I don’t have space for a full-sized bay tree?
Try these compact evergreen options for privacy:
- Dwarf Bay Laurel (Laurus nobilis 'Angustifolia') – Grows 6–10 feet tall.
- Italian Bay (Laurus nobilis 'Sarcone') – Slower-growing, great for small yards.
- Holly or Boxwood – Faster-growing, but need more pruning.
Wrapping up and next steps
Growing a bay tree plant as your evergreen privacy screen is a rewarding choice—it offers year-round lushness, aromatic charm, and low-maintenance beauty! 🌿 Whether you’re a seasoned gardener or just starting out, this resilient plant thrives with minimal fuss, making it perfect for hedges, borders, or even container gardens.
Ready to transform your outdoor space?
Your next step? Pick a sunny spot, gather your tools, and get planting! Start small with a single bay tree, or go bold with a full hedge—either way, you’ll enjoy the fragrant, glossy greenery for years to come. Happy gardening! 🌱