Vegetables
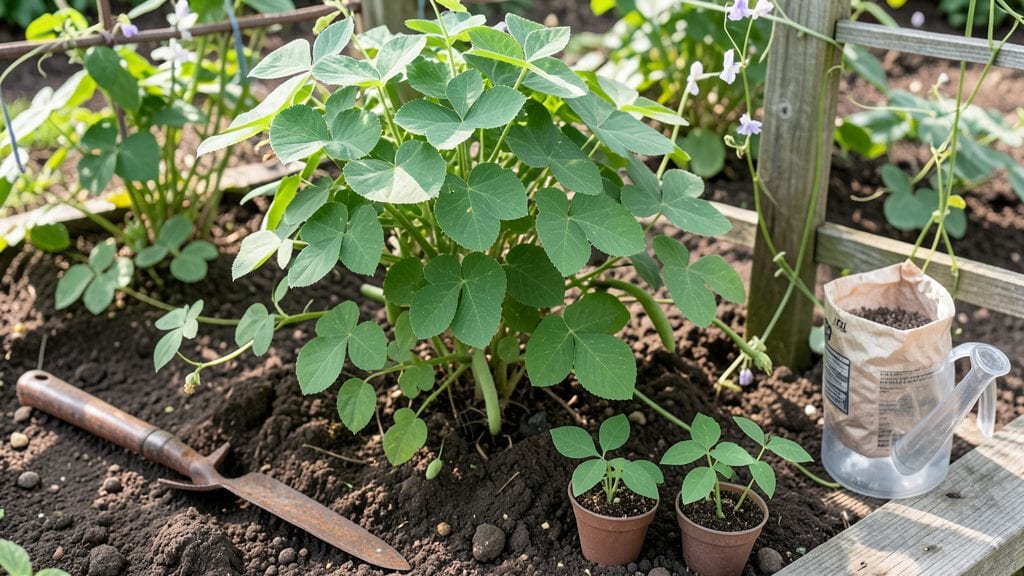
Planting snap beans in early spring unlocks a summer of tender, crisp pods straight from your garden. 🌱 I’ve grown them for years, and the difference between a patchy harvest and a bountiful one comes down to timing, soil, and a few simple tricks most gardeners overlook.
The secret isn’t complicated—it’s about giving these fast growers the right start so they explode into vines within weeks.
You’ll need a sunny spot with at least 6 hours of light, well-draining soil mixed with compost, and seeds spaced 4-6 inches apart in rows 18-24 inches apart. Plant them 1 inch deep when soil warms to 60°F, usually 2-3 weeks after your last frost.
Bush varieties like ‘Blue Lake’ or ‘Contender’ mature in 50-60 days, while pole beans like ‘Kentucky Wonder’ climb and produce longer. Water consistently—1 inch per week—but avoid soggy soil, which invites disease.
By day 30, you’ll see those first true leaves unfurl, and within 60 days, you’ll be snapping off pods at their peak sweetness. The key is harvesting frequently—every 2-3 days—to keep plants producing.
Let pods get too big, and the flavor turns woody. I’ve had neighbors stop by just to watch the vines grow, and the smell of fresh-shelled beans cooking on the grill? That’s the real reward.
Works for small backyards, raised beds, or even large containers—just adjust spacing. If you’re in a hot climate, plant in late summer for a fall harvest. The best part? These beans are foolproof once you get the basics right. Let’s get those seeds in the ground!
📚 In This Guide
- What you need
- Instructions
- Tips and common mistakes
- Wrapping up and next steps
What you need
- ● Snap bean seeds: Choose a variety like 'Blue Lake,' 'Contender,' or 'Provider' (60-90 seeds per pound, depending on the type). Pro tip: Buy seeds labeled for your region’s growing zone!
- ● Seed-starting soil or potting mix: 1-2 cubic feet (for direct sowing) or a 4-inch pot per seedling (for transplanting). Look for a mix with 50-70% compost for best results.
- ● Fertilizer: A balanced 10-10-10 or organic option like composted manure (1 cup per 10 feet of row). Pro tip: Avoid high-nitrogen fertilizers—they’ll boost leaves, not pods!
- ● Mulch: Straw, grass clippings, or shredded leaves (2-3 inches thick) to retain moisture and suppress weeds.
- ● Garden trowel or transplanting spade (for digging holes or rows).
- ● Watering can or hose with a gentle spray nozzle (snap beans hate soggy soil!).
- ○ Garden twine or stakes (optional): Use if your variety is pole beans (6-foot stakes or trellis for climbing types).
- ● Row marker or sticks (to mark planting lines if needed).
- ○ Gloves (optional): Protect your hands from thorns (some varieties have them!) or dirty soil.
- ● Sunlight: A spot with 6-8 hours of full sun daily (partial shade in hot climates is fine).
- ● Soil temperature: Wait until soil is at least 60°F (15°C)—use a soil thermometer if unsure!
- ● Well-draining soil: Snap beans hate waterlogged roots. Amend clay soil with compost or sand.
- ● Last frost date: Plant 2-3 weeks after your area’s last frost (they’re frost-sensitive!). Check your local frost dates.
- ● Bean support system: A DIY trellis (wire or bamboo) for pole beans to save space.
- ● Row cover: Lightweight fabric to protect seedlings from pests or cool nights.
- ● Plant tags: Label varieties if growing multiple types (trust us, you’ll forget!).
- ● Harvest basket or scissors: For easy, clean cuts when pods are ready!
Step-by-Step instructions for planting snap beans
Here’s how to grow vigorous, high-yielding snap bean plants that produce sweet pods in just 60 days.
🌱 Step 1: Prepare the Soil for Optimal Growth
Snap beans thrive in well-draining soil with a pH between 6.0 and 7.0. Work in 2-3 inches of compost (or aged manure) into the top 6 inches of soil to enrich it with organic matter. I like to add a handful of bone meal at planting time—this boosts phosphorus, which encourages strong root and vine development.
Break up any clumps and remove rocks or debris to create a loose, crumbly texture. The soil should feel like a damp sponge when squeezed—if it crumbles easily, it’s ready. Avoid working the soil when it’s wet; compacted soil slows root growth and delays germination.
🌿 Step 2: Plant Seeds at the Right Depth and Spacing
Plant seeds 1 inch deep and 3-4 inches apart in rows spaced 18-24 inches apart. For bush varieties, I stick with 3 inches apart—this prevents overcrowding and ensures each plant gets enough airflow. If you’re growing pole beans, space seeds 4-6 inches apart and provide a trellis or stakes for climbing support.
Place 2-3 seeds per hole and thin to the strongest seedling once they’re 2-3 inches tall. I use my finger to gently remove weaker seedlings at the base, being careful not to disturb the roots of the remaining plant. This ensures each plant has enough nutrients and space to develop bushy vines.
☀️ Step 3: Provide Warmth and Consistent Moisture
Snap beans germinate best in soil temperatures between 60-85°F. If your soil is cooler, cover it with a black plastic mulch for a few days to warm it up. Water the soil 1 inch deep before planting, then keep it consistently moist—never soggy—during germination. I check moisture by sticking my finger 1 inch into the soil; if it feels dry, it’s time to water.
Once seedlings emerge, reduce watering slightly but maintain 1 inch of water per week. Overwatering can lead to root rot, while underwatering causes blossom-end rot in the pods. Mulch with straw or grass clippings after germination to retain moisture and suppress weeds.
✂️ Step 4: Support and Prune for Maximum Yield
For bush varieties, no pruning is needed—just let the plants grow naturally. For pole beans, install 5-6 foot tall trellises or stakes at planting time. As vines grow, gently weave them through the trellis to encourage upward growth. This saves space and makes harvesting easier.
Remove any yellow or diseased leaves immediately to prevent the spread of pests. I also pinch off the first few flowers if the plants look stressed—this redirects energy to root and vine growth, leading to a stronger harvest later. Watch for bean beetles or aphids; a strong spray of water usually knocks them off before they cause damage.
⏰ Step 5: Harvest at Peak Sweetness for Continuous Production
Harvest snap beans when pods are 4-6 inches long and firm to the touch. I pick every 2-3 days to encourage more production—beans left on the vine too long become tough and stringy. Use sharp scissors or pinch them off just above a leaf node to avoid damaging the plant.
With proper care, a single plant produces 4-6 pods per week during peak season. If you miss a harvest window, the pods will turn yellow and dry out—this signals the end of that plant’s productive life. Succession planting every 2 weeks ensures a steady supply all season long.
Tips & tricks for planting snap beans
A few simple strategies can transform your snap bean harvest from mediocre to spectacular. Here's what I've learned after years of trial and error in the garden.
Soil Temperature Matters: The 60-85°F soil temperature range in Step 3 is critical for germination. If your soil runs cooler, consider using a seedling heat mat for the first 5-7 days. I've seen germination rates double when maintaining consistent warmth during this period. For cooler climates, plant in black plastic mulch a week before your last frost date to warm the soil faster.
Thinning Technique: When thinning seedlings in Step 2, I use a small hand trowel to gently loosen the soil around weaker plants before pulling. This prevents disturbing the roots of your remaining plants. Always thin to the strongest seedling—look for the one with the most vibrant leaves and sturdiest stem. The 2-3 inches spacing gives each plant room to develop bushy vines without competing for nutrients.
Watering Wisdom: The 1 inch of water per week guideline in Step 3 works best when applied consistently. I water in the morning to allow foliage to dry before evening, reducing disease risk. For container gardening, use self-watering pots—they maintain that perfect moisture level without the guesswork. Remember, snap beans are more forgiving of underwatering than overwatering, but soggy soil leads to root rot faster than you'd think.
Harvest Hack: For continuous production in Step 5, I harvest every 2 days during peak season and store pods in the fridge for up to 5 days. The key is harvesting when pods are 4-6 inches long—they should snap crisply when bent. If you notice pods turning yellow, that's your signal to harvest immediately or the plant will stop producing. I also recommend using sharp scissors to avoid damaging the vine, which helps maintain production for weeks longer.
Pro Tips for Planting Snap Beans
- A few simple strategies can transform your snap bean harvest from mediocre to spectacular.
- Soil Temperature Matters: The 60-85°F soil temperature range in Step 3 is critical for germination.
- Thinning Technique: When thinning seedlings in Step 2, I use a small hand trowel to gently loosen the soil around weaker plants before pulling.
Frequently asked questions
Got questions about growing snap beans?
You’re not alone! Whether you’re a first-time gardener or a seasoned pro, these answers will help you grow crisp, flavorful pods like a pro.
When is the best time to plant snap beans?
Snap beans thrive in warm soil—wait until the ground reaches at least 60°F (15°C) and all frost risk has passed. In most regions, this means planting 2–3 weeks after your last spring frost (typically April–June in the U.S.). For cooler climates, consider succession planting every 2 weeks for a continuous harvest!
How long does it take for snap beans to grow?
From seed to harvest, snap beans take 50–60 days for bush varieties and 55–65 days for pole beans. Start checking pods 10–14 days after flowering—they’ll go from tiny to ready-to-pick in just a few days! Pro tip: Harvest frequently to encourage more production.
Can I grow snap beans in containers or small spaces?
Bush beans are perfect for containers (5+ gallons), window boxes, or small raised beds. Pole beans need more space but can be trellised vertically in 5-gallon pots or hanging planters. Just ensure 6–8 hours of sunlight daily and well-draining soil. Bonus: Containers warm up faster in spring, giving you an early start!
What should I do if my snap bean plants have holes or wilting leaves?
Holes in leaves? Bean beetles or slugs might be the culprits. Try row covers, diatomaceous earth, or handpicking pests. Wilting could signal underwatering, overwatering, or root rot. Check soil moisture (keep it consistently moist but not soggy) and ensure good drainage. Prevention tip: Rotate crops yearly to avoid soil-borne diseases.
Can I plant snap beans in late summer for a fall harvest?
Yes! For a fall crop, plant 80–100 days before your first frost (e.g., July–August in many zones). Choose shorter-maturing varieties (like ‘Blue Lake’ or ‘Contender’) and use black plastic mulch to extend the season. Just be prepared for earlier harvests as days shorten.
What can I plant with snap beans to improve growth?
Snap beans love companions! Pair them with corn, cucumbers, or potatoes (the "Three Sisters" trio), or onions, garlic, or celery to deter pests. Avoid planting near peas or tomatoes, as they compete for nutrients. Fun fact: Marigolds nearby can repel bean beetles naturally!
Wrapping up and next steps
Planting snap beans is a rewarding journey that delivers fast, fresh, and flavorful harvests in just 60 days! Whether you're a beginner or a seasoned gardener, these versatile plants thrive with minimal fuss—just good soil, sunlight, and a little patience. 🌱
Now that you’re equipped with the how-to, why not take the next step? Try experimenting with varieties, succession planting, or even growing them in containers. Your garden—and your taste buds—will thank you!