Vegetables
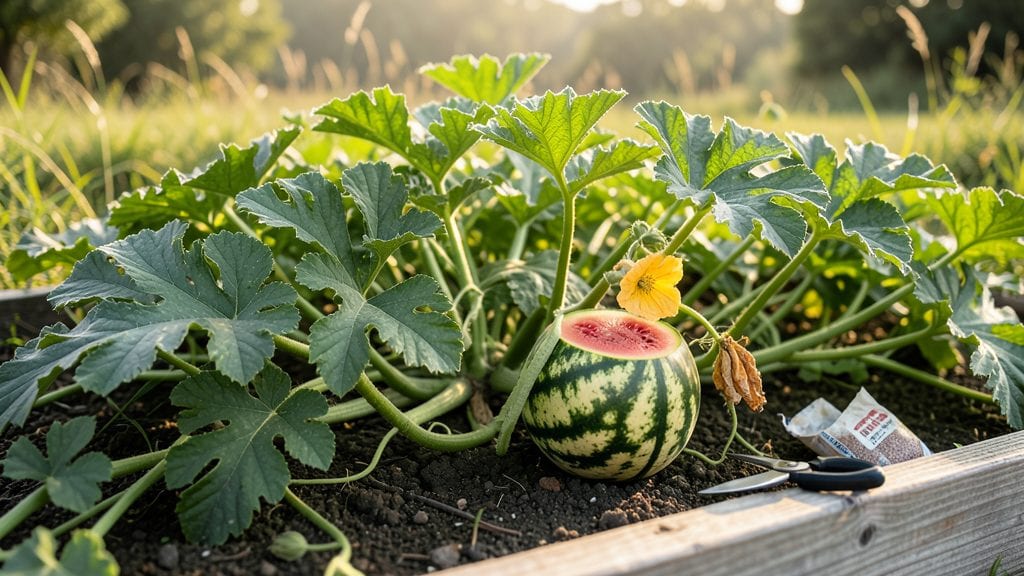
Growing a crimson watermelon plant means your summer will taste like sunshine in every bite—deep red flesh, crisp texture, and that unmistakable sweetness that makes store-bought melons feel like a compromise.
I’ve grown this variety for years, and the secret isn’t just patience; it’s giving those sprawling vines exactly what they crave: heat, space, and a little extra TLC during the hottest weeks.
The first time I sliced into a homegrown Crimson watermelon, still warm from the vine, I knew I’d never go back to the grocery store version.
The requirements are straightforward but non-negotiable: full sun (at least 8 hours daily), well-draining soil rich in organic matter, and a 10-foot radius to let those vines stretch out. Most beginners underestimate the space—trust me, cramming them into a small bed leads to stunted growth and bitter fruit.
Start seeds indoors 4-6 weeks before your last frost, then transplant after soil temperatures hit 70°F, because cold roots mean slow starts. Water deeply 1-2 times per week, soaking the soil 6-8 inches down—consistency is key here, especially when those first yellow blooms appear.
By mid-summer, you’ll be rewarded with bold, glossy vines heavy with fruit, and when you finally harvest that first Crimson watermelon, the weight alone tells you it’s worth the wait.
The flesh is shockingly juicy, with a sweetness that builds as it ripens—no bland aftertaste, just pure summer in every slice. The best part? These plants thrive in USDA Zones 4-10, so whether you’re in a hot desert climate or a humid southern summer, they’ll deliver.
Here’s the thing—Crimson watermelons are foolproof once you nail the basics, but they’ll forgive mistakes better than most varieties. Even if you miss a watering or two, they bounce back. The real magic happens when you let them ripen fully on the vine—that’s when the sugar content peaks.
Now, let’s get those seeds planted so you can experience the harvest for yourself.
📚 In This Guide
- What you need
- Instructions
- Tips and common mistakes
- Wrapping up and next steps
What you need
- ● Crimson watermelon seeds: 3–5 seeds per plant (or 1–2 seeds per container if space is limited). Choose Crimson Sweet or similar heirloom varieties for deep red flesh.
- ○ Growing containers (optional): 5-gallon pots or larger (for container gardening)
- ● Fabric grow bags (10+ gallons) for better drainage
- ● Well-draining soil: 10–15 lbs of a mix like 50% potting soil + 50% compost (or store-bought watermelon-specific blend). Avoid heavy clay.
- ● Fertilizer: Balanced 10-10-10 or 5-10-10 fertilizer (1 lb per 100 sq ft)
- ● Organic options: Fish emulsion or compost tea (for a natural boost)
- ● Mulch: Straw or black plastic mulch (to retain moisture and suppress weeds).
- ○ Trellis or stakes (optional): 4–6 ft tall for vining varieties (saves space and improves air circulation).
- ● Watering can or hose: With a gentle spray nozzle (watermelons need 1–2 inches of water weekly).
- ● Pruning shears: For trimming excess vines or dead leaves.
- ● Warmth: Crimson watermelons thrive in 70–90°F (21–32°C) soil temps. Wait until after the last frost (Zone 4+) or start indoors 4–6 weeks before transplanting.
- ● Sunlight: Full sun (6–8+ hours daily). Partial shade can reduce yield.
- ● Space: In-ground: 3–4 ft between plants, 6–8 ft between rows.
- ● Containers: 1 plant per 5-gallon pot (or 2 in 10+ gallons).
- ● pH Level: Aim for 6.0–6.8 (test soil with a kit if unsure).
- ● Soil moisture meter (to avoid over/under-watering).
- ● Row covers (for early planting or pest protection).
- ● Handheld fan (for pollination in greenhouses or windless areas).
- ● Drip irrigation system (for consistent watering).
- ● Seedling heat mat (if starting indoors in cool climates).
Step-by-step instructions for growing Crimson watermelon plants
Here’s how to cultivate bold, sprawling vines that produce those signature deep-red, sweet-fleshed watermelons.
🌱 Step 1: Select and Prepare the Planting Site
Crimson watermelons thrive in warm soil and full sun, so choose a location that receives at least 8 hours of direct sunlight daily. These vines spread aggressively—plan for 10-15 feet of space per plant or use a trellis if vertical growth is preferred. Before planting, enrich the soil with 2-3 inches of compost mixed into the top 6 inches of soil to ensure nutrients are available for heavy feeders.
Test the soil pH—watermelons prefer a slightly acidic to neutral range of 6.0-7.0. If your soil is heavy clay, amend it with sand or coconut coir to improve drainage. Avoid planting in the same spot where cucumbers, squash, or melons grew last season to prevent disease buildup.
💧 Step 2: Plant Seeds or Transplants at the Right Time
Start seeds indoors 4-6 weeks before the last frost date in biodegradable pots to avoid disturbing roots during transplanting. Plant seeds 1 inch deep in warm soil, spacing them 2-3 feet apart in rows 6 feet apart. If using transplants, harden them off for 7-10 days before moving them outside to prevent shock.
Soil temperature is critical—wait until the ground reaches at least 70°F before planting. You’ll know it’s time when the soil feels warm to the touch and daytime temperatures consistently stay above 65°F. Planting too early in cold soil slows germination and weakens seedlings.
☀️ Step 3: Provide Consistent Water and Nutrients
Watermelons need 1-2 inches of water per week, delivered at the base of the plant to keep foliage dry and prevent fungal diseases. Use drip irrigation or soaker hoses to maintain even moisture—avoid overhead watering, which can spread mildew. Mulch around plants with straw or black plastic to retain soil moisture and suppress weeds.
Fertilize lightly at planting with a balanced 10-10-10 formula, then switch to a low-nitrogen, high-potassium fertilizer (like 5-10-10) once vines start running. Over-fertilizing with nitrogen encourages leafy growth at the expense of fruit development. Watch for yellowing leaves—this often signals either overwatering or nutrient deficiency.
✂️ Step 4: Train Vines and Monitor for Pests
As vines grow, guide them along the ground or a trellis to maximize space and improve air circulation. Prune any lateral shoots that form at the base of the main stem to direct energy toward fruit production. Remove any yellow or diseased leaves immediately to prevent spread.
Keep an eye out for cucumber beetles, aphids, and powdery mildew—common watermelon pests. Handpick beetles or spray with neem oil as a preventive measure. If vines show signs of stress, like curling leaves or stunted growth, check the undersides for pests and treat promptly.
⏰ Step 5: Harvest at Peak Ripeness for Maximum Juiciness
Crimson watermelons typically mature in 75-90 days, depending on your climate. Harvest when the curled tendril near the stem turns brown and dry and the melon sounds hollow when tapped. The ground spot should also feel slightly soft to the touch.
Use a sharp knife to cut the melon from the vine, leaving 1-2 inches of stem attached. Store harvested watermelons in a cool, dry place (around 50-55°F) for up to 2 weeks. The deeper the red flesh, the sweeter and juicier the harvest—so choose the most vibrant melons for slicing.
Tips & tricks for perfect Crimson watermelon growth
These essential insights will help you cultivate watermelons that burst with juicy sweetness and vibrant color, turning your garden into a summer oasis.
Soil Preparation Matters: The 2-3 inches of compost mixed into the top 6 inches of soil isn't just about nutrients—it's about creating an ideal structure. I've found that adding a handful of perlite to clay-heavy soils prevents compaction, which watermelons hate. Test your soil's moisture retention after amending: it should feel like a well-wrung sponge, not a muddy brick. This preparation directly impacts root development, which translates to juicier fruit.
Timing is Everything: Those 8 hours of sunlight aren't negotiable—watermelons are sun worshippers. I've learned the hard way that partial shade reduces sugar development. Position your plants where they'll receive morning sun and afternoon light, avoiding areas where trees or buildings cast shadows after noon. The 70°F soil temperature threshold is equally critical: use a soil thermometer to confirm readiness, as cool mornings can drop temperatures below this crucial mark.
Watering Wisdom: The 1-2 inches of water per week recommendation assumes consistent conditions. In my experience, morning watering prevents fungal issues better than evening sessions. Install a rain gauge nearby to track actual rainfall—overwatering is a silent killer that causes blossom-end rot. When the top inch of soil feels dry, that's your cue to water deeply at the base, not just sprinkle the leaves.
Harvesting Secrets: That 75-90 day window can feel like an eternity, but patience pays off. I've developed a simple test: tap the melon—it should sound like a hollow drum when ripe. The tendril test is equally reliable, but don't be fooled by size alone. Some of my most disappointing harvests came from prematurely picked melons that were large but bland. The deeper red flesh you're aiming for develops fully only when the melon is fully mature.
Pro Tips for Crimson Watermelon Plant
- These essential insights will help you cultivate watermelons that burst with juicy sweetness and vibrant color, turning your garden into a summer oasis.
- Soil Preparation Matters: The 2-3 inches of compost mixed into the top 6 inches of soil isn't just about nutrients—it's about creating an ideal structure.
- Timing is Everything: Those 8 hours of sunlight aren't negotiable—watermelons are sun worshippers.
Frequently asked questions
How long does it take for a crimson watermelon plant to bear fruit?
A crimson watermelon plant typically takes 70 to 90 days from seed to harvest, depending on your climate and growing conditions. If you’re starting seeds indoors, plan to transplant seedlings outdoors 2 to 3 weeks before the last frost—this gives the vines plenty of warm weather to thrive. Patience is key, but the wait is worth it for those vibrant red fruits!
Can I grow crimson watermelon in containers? If so, what size pot do I need?
Crimson watermelons can thrive in containers, but they need space to stretch. Aim for a pot that’s at least 15 to 20 gallons and 12 inches deep. Choose a container with drainage holes and place it in a sunny spot (6+ hours of sunlight daily). Just be prepared for vines to sprawl—consider a trellis or large grow bag if space is tight.
Why aren’t my crimson watermelon flowers turning into fruit?
If your flowers aren’t converting to fruit, it’s often due to pollination issues, temperature extremes, or nutrient deficiencies. Hand-pollinate by gently brushing male flowers onto female flowers (look for tiny watermelons at the base of the flower). Also, ensure daytime temps stay between 75–90°F and avoid over-fertilizing with nitrogen—too much promotes leafy growth over fruit.
What are some good companion plants for crimson watermelon?
Crimson watermelons love companions that deter pests and improve growth! Plant them near corn, squash, or radishes (the "Three Sisters" method), or add marigolds or nasturtiums to repel cucumber beetles. Avoid planting near potatoes or melons, as they can compete for nutrients or spread disease. A happy garden starts with the right neighbors!
How do I overwinter a crimson watermelon plant?
Crimson watermelon plants are annuals, so they won’t survive winter—but you can save seeds! Let a ripe watermelon fully mature on the vine, then scoop out seeds, rinse them, and dry them in a cool, dark place. Store seeds in a paper envelope until next season. For container growers, bring pots indoors before frost or compost the plant and start fresh in spring.
Wrapping up and next steps
Growing a crimson watermelon plant is a rewarding journey that blends bold aesthetics with a juicy harvest—perfect for summer adventures! 🌱 With the right soil, sunlight, and care, you’ll soon be feasting on vibrant, sweet fruit that’s as stunning as it is delicious.
Whether you’re a seasoned gardener or a beginner, every seed planted today is a step toward a bountiful future.
Ready to take the next step? Start by sketching your garden layout—mark spots for vines, trellises, or containers—and order seeds or seedlings to kick off your harvest early. Happy planting! 🌞