Size
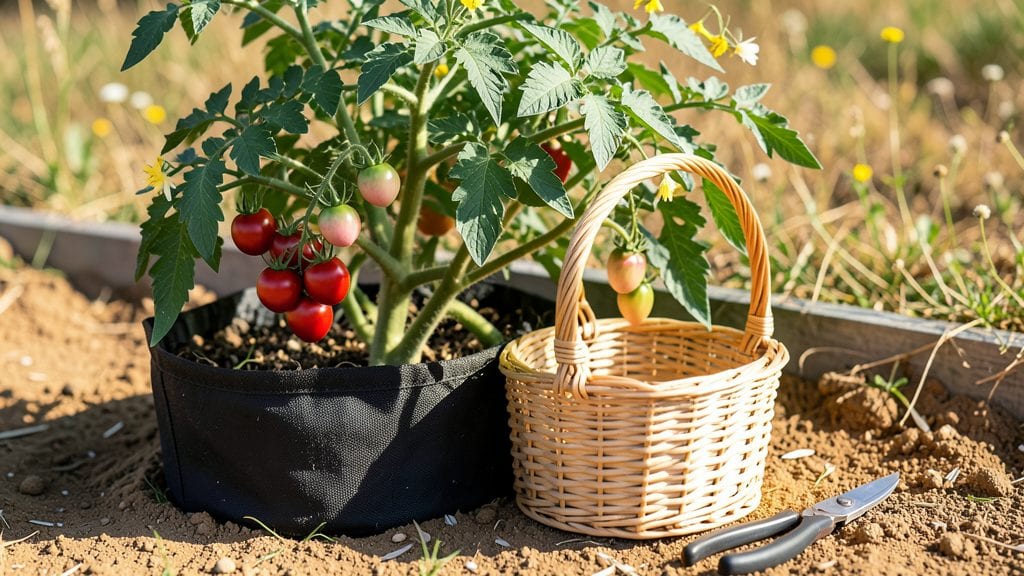
Growing your own food from plants doesn’t require a backyard—just smart space and a little know-how. 🌱 I’ve packed more tomatoes into a 4-foot square than my neighbors grow in their entire in-ground plot, and I’ll show you how to do it too, whether you’ve got a balcony, a sunny windowsill, or even just a sunny corner of your patio.
The secret isn’t fancy tools or expensive soil—it’s matching the right plants to your space and giving them what they actually need. We’re talking 3-5 gallon containers for tomatoes, shallow trays for greens, and a watering routine that keeps roots happy without drowning them.
Most beginners overwater or under-plant, but these hacks cut out the guesswork for foolproof results even in small areas.
Imagine plucking fresh basil for your morning coffee, snipping cherry tomatoes for sandwiches, or harvesting crisp lettuce in 4-6 weeks instead of buying wilted store-bought greens. The best part? Your harvest will taste better than anything you’ve ever bought, and you’ll cut grocery costs by 30-50%—no green thumb required.
Let’s turn that tiny space into a productive powerhouse.
Works for apartments, rooftops, or even indoor setups with grow lights. Here’s how to pick the easiest crops, avoid the most common mistakes, and keep your compact garden thriving all season long.
📚 In This Guide
- What you need
- Instructions
- Tips and common mistakes
- Wrapping up and next steps
What you need
- ● Containers: 5–10 5–10 gallon fabric grow bags or plastic pots with drainage holes (or repurpose buckets, old tires, or wooden crates!)
- ● Growing Medium: 2–3 cubic feet of high-quality potting mix (look for "organic" or "soil-less" blends) or coco coir for hydroponic setups.
- ● Seeds or Seedlings: 3–5 packets of fast-growing, compact varieties like: Cherry tomatoes (e.g., 'Tiny Tim' or 'Sweet 100')
- ● Leafy greens (e.g., 'Baby Kale' or 'Lettuce Mix')
- ● Herbs (e.g., 'Thyme,' 'Basil,' or 'Cilantro')
- ● Peppers (e.g., 'Shishito' or 'Jalapeño')
- ● OR 3–5 healthy seedlings from a nursery (skip the seed-starting hassle!)
- ● Fertilizer: 1 balanced organic fertilizer (e.g., 5-5-5 or fish emulsion) or 1 slow-release granular fertilizer (like Osmocote).
- ● Watering Supplies: 1 watering can with a rose attachment (for gentle watering)
- ● OR 1 drip irrigation kit (for hands-off hydration)
- ● 1 hand trowel (for planting and soil adjustments)
- ● 1 pruning shears (to snip dead leaves or harvest)
- ● 1 measuring cup or spoon (for precise fertilizer/water ratios)
- ● 1 spray bottle (for misting seedlings or pests)
- ● 1 gloves (to protect your hands from dirt and thorns)
- ● 1 grow light (LED or fluorescent) for indoor setups or low-light spaces.
- ● 1 soil moisture meter (to avoid over/under-watering).
- ● 1 compost bin (to recycle kitchen scraps into nutrient-rich soil).
- ● Egg cartons or toilet paper rolls (for seed-starting before transplanting).
- ● 1 label maker or sticks (to track what’s planted where!).
Step-by-step instructions for maximizing yields in small-space food gardens
Here’s how to transform limited square footage into a high-output, food-producing powerhouse.
🌱 Step 1: Plan for Vertical and Intercropping Layouts
Start by mapping your space with vertical growth in mind. Use the 4-foot-tall trellises to train vining plants like pole beans or cucumbers upward, freeing up ground space for bushier crops. I always position the tallest plants—like the sunflower variety—along the north side of the bed to avoid shading shorter crops. This ensures every inch of sunlight gets utilized efficiently.
For intercropping, pair fast-maturing crops like radishes (ready in 30 days) with slower growers such as tomatoes or peppers. Radishes break up the soil, deter pests, and create shade for seedlings. Just keep the 12-inch spacing between plants to avoid competition for nutrients. Watch for the first true leaves on your slower growers to time your radish harvest before they crowd the main crop.
🪴 Step 2: Optimize Containers and Soil for High Density
Fill the 10-gallon fabric grow bags with a 50/50 mix of potting soil and compost—this blend retains moisture while allowing roots to breathe. Fabric pots prevent root circling, which is critical for compact varieties like bush beans or determinate tomatoes. I always add a handful of worm castings to each bag to boost microbial activity, which translates to better nutrient uptake and faster growth.
For in-ground beds, layer 2 inches of compost beneath the topsoil to create a nutrient-rich zone where roots can access food immediately. Avoid tilling—just loosen the soil with a broadfork to preserve soil structure. You’ll see stronger, more resilient plants when the soil stays loose and aerated, especially in the first 6 weeks of growth.
☀️ Step 3: Implement Precision Watering and Light Strategies
Use the drip irrigation system to deliver ½ gallon per plant daily, adjusting for full sun exposure. Drip systems keep foliage dry, reducing fungal risks like powdery mildew. I set the emitters to release water slowly at the base—never overhead—to prevent soil erosion and splashing diseases onto leaves. Check soil moisture by sticking your finger 1 inch deep; if it feels dry, it’s time to water.
Supplement natural light with the LED grow light during cloudy days or in shaded corners. Position it 6 inches above the tallest plants and adjust as they grow. You’ll know the light is sufficient when leaves stay deep green and plants grow compact rather than leggy. Avoid overlighting—14 hours daily is plenty for most edibles.
✂️ Step 4: Prune and Harvest Strategically for Continuous Production
Prune tomato suckers and pepper side shoots regularly to redirect energy into fruit production. Use the bypass pruners to make clean cuts just above a leaf node. This keeps plants manageable in containers and encourages bushier growth. For leafy greens like kale or swiss chard, harvest the outer leaves first, leaving the inner growth intact. You’ll get continuous harvests without sacrificing plant health.
When fruits or vegetables reach peak ripeness—like tomatoes turning fully red or zucchini reaching 6 inches—harvest them promptly. Overripe produce attracts pests and reduces future yields. I always check plants every other day during peak season to stay ahead of overproduction. Store harvested goods in a cool, dark place to extend freshness.
🌿 Step 5: Extend the Season with Succession Planting
After harvesting early crops like lettuce or spinach, replant the same space with fast-growing successors like bush beans or radishes. This keeps your garden productive year-round without wasting space. I stagger plantings every 2 weeks to ensure a steady supply. For example, sow carrots in early spring, follow with beets in late spring, and then turnips in early summer.
Use the row covers to protect late-season crops from frost. These lightweight fabrics let in sunlight and rain while trapping heat. You’ll extend harvests by 2-4 weeks in both spring and fall. Just remove covers during the day if temperatures rise above 75°F to prevent overheating. Monitor plants daily for signs of stress—wilting or yellowing leaves signal it’s time to adjust coverage.
Tips & tricks for maximizing compact garden yields
Transforming limited space into a high-output garden isn't just about clever layouts—it's about strategic execution. Here are the game-changing techniques that'll help you squeeze every ounce of productivity from your small footprint.
Vertical Space Hack: When training vining plants like pole beans or cucumbers on your 4-foot trellises, use soft ties or old tights to secure them—never twist the stems. I learned this the hard way after crushing multiple plants with rough ties. The key is to adjust the ties as plants grow, keeping them snug but not constricting. For extra stability, weave in a few sunflower varieties along the north side—those deep roots provide natural support while maximizing vertical real estate.
Soil Science Secret: That 50/50 potting soil and compost mix in your 10-gallon fabric grow bags is your foundation, but here's the upgrade: Add a handful of biochar to each bag before planting. This porous carbon-rich material holds nutrients and improves drainage, giving your bush beans and determinate tomatoes that extra growth boost. For in-ground beds, consider adding a thin layer of mycorrhizal fungi powder with your 2 inches of compost—it forms symbiotic relationships with roots, enhancing nutrient absorption during those critical first 6 weeks.
Lighting Precision: The 6-inch height for your LED grow lights is perfect, but here's what nobody tells you: Adjust the light angle to match the sun's arc. In the morning, position it higher (closer to 8 inches) to prevent leggy growth, then lower it (back to 6 inches) as the day progresses. And that 14-hour daily light rule? Use a timer—consistency is everything. I've seen plants stretch toward windows when natural light fluctuates, so automate it. For cloudy days, increase to 16 hours temporarily to compensate.
Harvest Timing Trick: Those "every other day" checks during peak season are non-negotiable, but here's how to make them efficient: Grab a small basket and harvest only what you'll use immediately. For leafy greens like kale or swiss chard, cut entire outer leaves at the base—this stimulates regrowth from the center. For tomatoes and zucchini, harvest first thing in the morning when they're coolest and firmest. Pro tip: Store harvested greens in a bowl of ice water in the fridge to maintain crispness for up to 5 days.
Pro Tips for Plant Grow Food
- Transforming limited space into a high-output garden isn't just about clever layouts—it's about strategic execution. ...
- Vertical Space Hack: When training vining plants like pole beans or cucumbers on your 4-foot trellises, use soft ties...
- Soil Science Secret: That 50/50 potting soil and compost mix in your 10-gallon fabric grow bags is your foundation, b...
Frequently asked questions
Got questions about growing your own plant-based food in compact spaces?
You’re not alone! Here are answers to the most common queries—from beginners to seasoned green thumbs.
What are the easiest plant-based foods to grow in small spaces?
Start with leafy greens (like spinach or kale), herbs (basil, mint, or parsley), and compact veggies (cherry tomatoes, peppers, or bush beans). These thrive in containers, need minimal space, and deliver fast results. Bonus tip: Microgreens (like radish or sunflower sprouts) sprout in 7–14 days with just sunlight and water!
How long does it take to harvest food from a compact garden?
Timing varies by plant! Herbs (e.g., cilantro) may be ready in 3–4 weeks, while tomatoes or peppers take 2–3 months. Leafy greens like lettuce can be harvested in 4–6 weeks. Check seed packets for specifics—fast growers (like radishes) can surprise you in as little as 3 weeks!
What if my plants aren’t growing? Troubleshooting tips for small gardens.
Yellow leaves? Overwatering or poor drainage. Wilting? Underwatering or too much sun. Pests (like aphids) can stunt growth—spray with soapy water or introduce ladybugs. Check soil: It should be moist but not soggy. Pro tip: Rotate plants every 2–3 weeks for even sunlight exposure!
Can I grow food indoors without a sunny window?
Use a grow light (LED bulbs work great) for 12–16 hours/day. Herbs and microgreens adapt well to indoor setups. For hydroponics or aeroponics, you’ll need a nutrient solution—but no soil! Bonus: Basil and mint thrive under grow lights on a kitchen counter.
What’s the best alternative if I don’t have space for traditional gardening?
Try vertical gardening (hanging pockets, trellises, or wall planters) or stackable planters. Window farms (like the Click & Grow system) use LED lights and hydroponics. Even a balcony or apartment patio can host herbs, strawberries, or dwarf fruit trees in pots!
Wrapping up and next steps
Growing your own food doesn’t require a sprawling backyard—just a little creativity and the right compact garden hacks!
Whether you’re using vertical spaces, repurposed containers, or hydroponics, you can turn even the smallest spot into a thriving plant-based food oasis. 🌱 The key is starting small, staying consistent, and watching your efforts bloom into fresh, homegrown meals.
Ready to dive in? Pick one tip from this guide and try it this week—your future self (and taste buds) will thank you! 💚 Grab your supplies and start planting today!