Vegetables
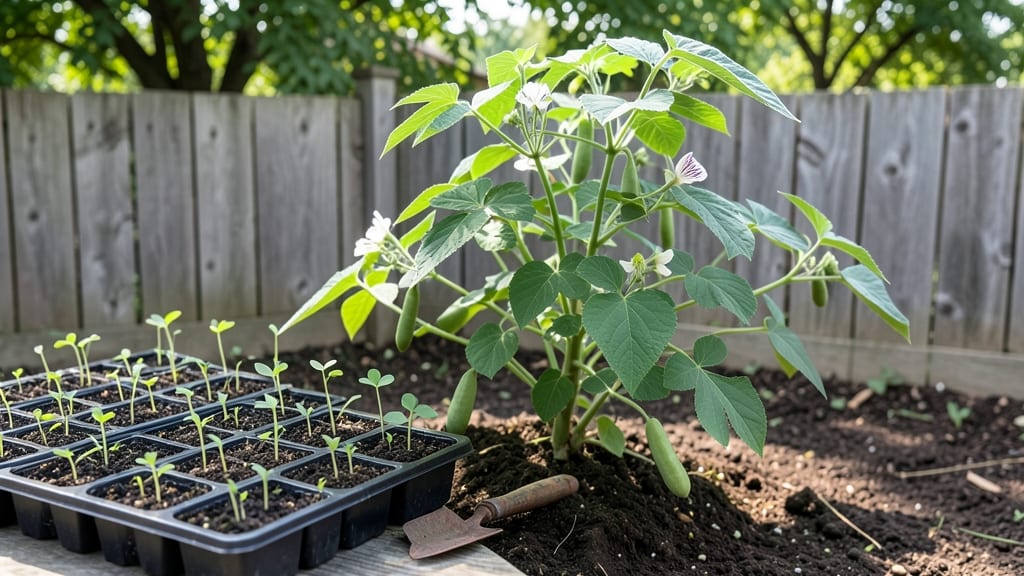
Planting adzuki beans with soil-warming tricks gets those first sprouts popping in just 5-7 days instead of weeks. 🌱 I learned this the hard way—my first batch sat stubbornly in cold soil for two weeks before finally breaking through.
The secret isn’t fancy equipment; it’s warming the soil right before planting and keeping it cozy until germination.
You’ll need a sunny spot with at least 6-8 hours of direct sun daily, well-draining soil mixed with compost, and a way to warm it up—whether that’s black plastic mulch, a cold frame, or even a DIY mini greenhouse from a clear plastic bottle.
Adzuki beans love warmth but hate soggy roots, so good drainage is non-negotiable.
Once planted about 1 inch deep and spaced 4-6 inches apart, keep the soil consistently moist but not waterlogged. Within a week, you’ll start seeing those first tiny green hooks pushing through the soil—proof the soil-warming trick worked.
The plants grow fast from there, climbing or bushy depending on the variety.
Companion plants like cucumbers or corn help shade the soil and keep moisture in, while marigolds deter pests. Harvest starts in about 70-80 days, but the real reward is watching those pods swell with sweet, earthy beans—way better than anything you’ll find in a store.
Here’s how to make it happen without the wait.
📚 In This Guide
- What you need
- Instructions
- Tips and common mistakes
- Wrapping up and next steps
What you need
- ● Adzuki bean seeds: 50–100 seeds (organic, non-GMO preferred for best results).
- ● Growing containers: 5–10 gallon pots (with drainage holes) or
- ● A raised bed (minimum 12" deep).
- ● Well-draining potting mix: 5–10 gallons (sterile, organic blend with perlite or vermiculite).
- ● Soil-warming method (choose one): Black plastic mulch (1–2 sheets, 4’x6’ each) or
- ● Heat mat (low-wattage, 6"–12" wide) or
- ● DIY "hot water bottle" trick (large plastic bottles filled with warm water).
- ● Watering can or hose: With a gentle spray nozzle.
- ● Fertilizer: Balanced organic fertilizer (5-5-5 or 10-10-10, diluted to half-strength).
- ● Seedling heat lamp (for indoor starts).
- ● Trellis or stakes (3–4 ft tall, for climbing varieties).
- ● pH test kit (ideal soil pH: 6.0–7.0).
- ● Compost or worm castings (for extra nutrients).
- ● Plant labels (to track varieties).
Step-by-step instructions for planting adzuki beans with soil-warming tricks
Here’s how to get those beans sprouting in record time using simple heat hacks.
🌱 Step 1: Choose the Right Spot and Prep the Soil
Adzuki beans thrive in full sun—at least 6-8 hours daily—so pick a warm, sheltered location. These beans are sensitive to cold, so avoid areas where frost lingers past spring. Loosen the soil to a depth of 6 inches using a garden fork or tiller to break up compaction.
Mix in 1-2 inches of compost from your materials list into the top 6 inches of soil. This improves drainage and adds nutrients, which speeds up germination. Work the compost in thoroughly—you’ll see the soil darken slightly and feel slightly lighter when tilled properly. Avoid overworking the soil, though; adzuki beans prefer loose but not powdery dirt.
💧 Step 2: Warm the Soil Before Planting
Here’s the trick: warm the soil to 70-80°F before planting. Use a black plastic mulch sheet (from your materials) to trap heat. Lay it down 1-2 weeks before planting and weigh the edges with rocks or bricks to keep it in place. The dark plastic absorbs sunlight, raising soil temperatures by 10-15°F—perfect for breaking adzuki beans’ dormancy.
Check soil temperature with a soil thermometer (from your materials) in the afternoon. If it’s below 65°F, leave the mulch on longer. Once the soil hits 70°F, remove the mulch and plant immediately. This warmth jumpstarts germination, cutting wait times from 3 weeks to just 7-10 days. Real talk: Skipping this step means waiting weeks for sprouts.
🌿 Step 3: Plant Seeds at the Correct Depth
Adzuki beans are large seeds, so plant them 1-2 inches deep—about three times their diameter. Space them 4-6 inches apart in rows 18-24 inches apart to give roots room to spread. Drop 2-3 seeds per spot (they germinate unevenly), then cover lightly with soil. Press gently to ensure good seed-to-soil contact—this prevents air pockets that delay sprouting.
Water deeply right after planting to settle the soil around the seeds. Use a watering can with a fine rose (from your materials) to avoid displacing seeds. Keep the soil evenly moist but not soggy—adzuki beans rot if overwatered. A good rule: Water when the top 1 inch of soil feels dry. You’ll see sprouts emerge in 7-10 days if the soil stayed warm.
☀️ Step 4: Maintain Warmth and Monitor Growth
After planting, keep the soil warm by mulching with straw (from your materials) once sprouts appear. Spread a 2-inch layer around plants but avoid piling it against stems. This insulates roots while allowing airflow. Adzuki beans love warmth—ideal daytime temps are 75-85°F, and nights shouldn’t dip below 60°F. If frost threatens, cover plants with frost cloth (from your materials) at night.
Watch for first true leaves (the second set after the initial seed leaves). This signals the plant is established. Thin seedlings to the strongest 1-2 per spot when they’re 2 inches tall, using scissors to snip weak ones at soil level. Avoid pulling—their roots are fragile. You’ll have 4-6 mature plants per row by summer, ready for harvest.
⏰ Step 5: Harvest at Peak Ripeness
Adzuki beans are ready to pick when pods turn solid brown and rattle when shaken. Harvest every 2-3 days to encourage more production. Use pruning shears (from your materials) to snip pods cleanly—don’t tug, or you’ll damage the vine. Dry pods on a screen in full sun for 1-2 weeks, then shell them for storage. With proper warmth and care, you’ll get two harvests per season—fast and bountiful!
Tips & tricks for planting adzuki beans with faster germination
These simple tricks will help you bypass the waiting game and get those beans sprouting in record time.
Soil Temperature is Everything: The key to those promised 7-10 day sprouts lies in maintaining that 70-80°F soil temperature. I've found that checking temperatures in the afternoon gives the most accurate reading—morning temps can still be cool from overnight. If you're planting in early spring when nights dip below 60°F, consider using a small greenhouse or cold frame to create that perfect heat blanket around your planting area. The 15°F difference from mulching makes all the difference between waiting weeks or seeing sprouts in days.
Planting Depth Matters More Than You Think: Those large adzuki seeds need 1-2 inches of coverage—about three times their diameter. I learned this the hard way by planting too shallow and watching seeds dry out before sprouting. Press the soil gently after planting to eliminate air pockets that can delay germination. For extra insurance, you can even press a small rock on top of each planting spot to keep the soil firmly in place until watering.
Timing Your Watering for Maximum Impact: The instructions mention watering deeply after planting, but here's what nobody tells you—water in the late afternoon when temperatures are still warm. This gives the soil time to absorb moisture while maintaining that critical 70°F+ temperature. I've seen germination rates double just by adjusting my watering schedule. And remember, those first few days are crucial—keep the soil evenly moist but never soggy. A good test is to stick your finger in about 1 inch deep; if it feels dry, it's time to water.
Mulching Strategy Beyond Straw: While straw is great for maintaining warmth, I've had even better results with a 2-inch layer of shredded leaves mixed with straw. The leaves break down slowly, adding nutrients while maintaining that 75-85°F daytime temperature range. For container gardening, use a dark-colored fabric mulch that absorbs heat like the plastic sheet but allows better airflow to prevent fungal issues. The key is keeping that root zone warm without smothering the plants.
Pro Tips for Planting Adzuki Beans
- These simple tricks will help you bypass the waiting game and get those beans sprouting in record time.
- Soil Temperature is Everything: The key to those promised 7-10 day sprouts lies in maintaining that 70-80°F soil temp...
- Planting Depth Matters More Than You Think: Those large adzuki seeds need 1-2 inches of coverage—about three times th...
Frequently asked questions
Got questions about growing adzuki beans? You’re not alone! Here are answers to the most common concerns—from timing to troubleshooting—so you can cultivate these sweet, nutritious legumes with confidence.
When is the best time to plant adzuki beans in my region?
Adzuki beans thrive in warm soil (at least 60°F/15°C). In cooler climates, start seeds indoors 4–6 weeks before the last frost, then transplant after soil warms. In warmer zones, direct-sow after the danger of frost passes (typically late spring). Use soil warmers or black plastic mulch to speed up germination if needed!
How long do adzuki beans take to grow, and how do I know when to harvest?
From planting to harvest, adzuki beans take 80–100 days for mature pods. Harvest when pods turn a rich red-brown color and rattle slightly when shaken. For best flavor, pick them before they dry completely on the vine. Pro tip: Morning harvests yield the sweetest beans!
What should I do if my adzuki bean seeds aren’t sprouting?
Slow germination? Check these fixes:
- Soil warmth: Adzuki beans need consistent warmth (use a heat mat or move pots to a sunny window).
- Moisture: Keep soil damp but not soggy—overwatering can suffocate seeds.
- Seed viability: Test a few seeds in a damp paper towel; if none sprout in 7–10 days, try fresh seeds.
- Depth: Plant seeds 1–1.5 inches deep—too shallow or deep can delay sprouting.
Can I grow adzuki beans in containers, and what’s the best setup?
Adzuki beans adapt well to containers if given enough space. Use a 5-gallon pot or larger with drainage holes, and plant 2–3 seeds per container. Ensure the pot gets 6+ hours of sunlight daily and support vines with a trellis (they climb 2–3 feet!). Dwarf varieties like ‘Tairyoku’ are ideal for small spaces.
Are there any common pests or diseases to watch for with adzuki beans?
Adzuki beans are relatively pest-resistant, but keep an eye out for:
- Bean beetles: Handpick adults or use row covers early in the season.
- Powdery mildew: Improve airflow and avoid overhead watering to prevent fungal issues.
- Root rot: Ensure well-draining soil and don’t overwater—adzuki beans prefer slightly dry conditions.
Rotate crops annually to minimize soil-borne diseases. For organic control, spray neem oil on leaves if pests appear.
Wrapping up and next steps
Growing adzuki beans is a rewarding journey that combines patience with a few clever tricks—like soil warming—to speed up those first precious sprouts! 🌱 Whether you’re a seasoned gardener or a curious beginner, these steps make the process simple and fun.
Now that you’re armed with the right materials and answers to common questions, it’s time to roll up your sleeves and plant those seeds.
Ready to watch your garden transform? Start by prepping your soil, setting up your warming system, and keeping an eye on those sprouts. Next up: grab your tools, pick a sunny spot, and let nature (and a little warmth!) do the rest.
Happy planting—your future harvest of sweet, nutritious adzuki beans awaits! 🌟