Flowers
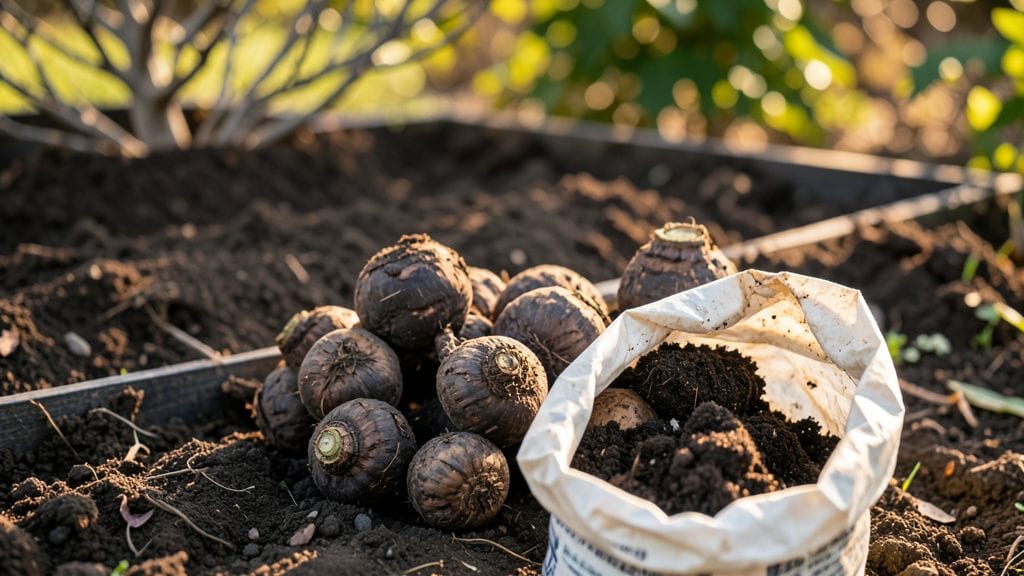
Planting dahlia corms at the right time and depth makes all the difference between a garden showstopper and a flop. ✨ I learned this the hard way when my first batch emerged late and leggy—until I adjusted the timing and dug deeper into the soil science.
The secret isn’t just patience; it’s matching the corms’ natural rhythm with your climate.
You’ll need well-draining soil, a sunny spot with at least 6 hours of light, and a fork to loosen the ground 6 inches deep. Most gardeners overlook soil prep, but adding compost or aged manure ensures those corms wake up hungry for nutrients.
Plant them 3-4 inches deep—too shallow, and they’ll flop; too deep, and blooms won’t emerge.
By mid-June, you’ll see those velvety green leaves unfurling, followed by blooms in every shade imaginable. The right depth keeps stems sturdy, while proper spacing (12-18 inches apart) prevents overcrowding. Even in small gardens, dahlias thrive—just give them room to breathe and a little afternoon shade in hot climates.
Here’s the kicker: store leftover corms in dry peat moss over winter, and you’ll have a head start next season. Mistakes happen—like planting too early—but with these tweaks, your dahlias will reward you with football-sized blooms that turn heads. Ready to dig in?
📚 In This Guide
- What you need
- Instructions
- Tips and common mistakes
- Wrapping up and next steps
What you need
- ● Dahlia corms: Purchase healthy, firm corms (size varies by variety—typically 1-2 inches in diameter). Aim for 10-20 corms depending on your garden size!
- ● Well-draining potting mix or garden soil: Enrich with compost (2-3 inches mixed into the top 12 inches of soil) for nutrient-rich growth.
- ● Organic fertilizer: A balanced 10-10-10 or 5-10-10 NPK ratio (1-2 tbsp per corm) to kickstart growth.
- ● Mulch (straw, wood chips, or shredded leaves): 2-3 inches to retain moisture and regulate soil temperature.
- ● Garden trowel or hand shovel: For digging precise holes (6 inches deep).
- ● Gloves: Protect your hands from thorns and soil.
- ● Measuring tape or ruler: To ensure correct planting depth (2-4 inches below soil surface).
- ● Watering can or hose with a gentle spray nozzle: For even hydration without disturbing corms.
- ● Dahlia cages or stakes: 3-4 feet tall to support tall varieties (e.g., 'Galaxy' or 'Café au Lait').
- ● Soil moisture meter: To monitor hydration levels—dahlias hate soggy roots!
- ● Epsom salt (magnesium sulfate): 1 tbsp per gallon of water monthly for vibrant blooms.
- ● Row covers or frost cloth: For early-season protection in cooler climates.
Step-by-Step instructions for planting dahlia corms
Here’s the foolproof method I use every spring to get dahlias blooming like crazy.
🌱 Step 1: Prep Corms for Planting
Soak your dahlia corms in lukewarm water for 2-4 hours before planting. This jumpstarts root growth and helps them establish faster. You’ll see the corm’s base swell slightly—this means it’s ready to go in the ground. Never skip this step; dry corms take longer to sprout.
While soaking, inspect each corm for soft spots or mold. Discard any that feel mushy or smell off—these won’t grow well. Healthy corms are firm and have a few small "eyes" (buds) where new shoots will emerge. These eyes should face upward when planted.
🪴 Step 2: Choose the Right Spot and Planting Depth
Dahlias thrive in full sun (at least 6 hours daily) and well-draining soil. Dig a hole 4-6 inches deep—this ensures the corm sits just below the soil surface with the eyes facing up. If your soil drains poorly, mix in 2-3 inches of compost to improve texture.
Space corms 12-18 inches apart in rows, leaving 2 feet between rows for easy maintenance. Planting too close crowds roots and reduces airflow, which invites rot. Tap the soil gently after placing the corm to eliminate air pockets around it.
☀️ Step 3: Water and Mulch for Success
Water the newly planted corms deeply right after planting—this settles the soil and encourages roots to spread. Keep the soil evenly moist but not soggy for the first 4-6 weeks. You’ll know it’s right when the top inch feels damp to the touch but doesn’t pool water.
Apply 2-3 inches of mulch (like shredded bark or straw) around each plant to retain moisture and regulate soil temperature. Mulch also suppresses weeds, which compete for nutrients. Replenish mulch as it breaks down throughout the season.
⏰ Step 4: Monitor Growth and Support Stems
Shoots will emerge in 2-4 weeks, but don’t rush to thin them. Dahlias often send up multiple stems, and you’ll want to keep the strongest 2-3 per corm. Once stems reach 12 inches tall, install a sturdy stake or cage—dahlias grow top-heavy and need support.
Pinch back the top set of leaves when stems are 12-18 inches tall to encourage bushier growth. This might seem counterintuitive, but it redirects energy to the roots and lower stems, resulting in more blooms. Watch for new side shoots to form within 2-3 weeks.
💧 Step 5: Feed and Water for Peak Blooms
Start fertilizing when you see true leaves (not the first tiny sprouts). Use a balanced 10-10-10 fertilizer every 2-3 weeks during the growing season. Dahlias are heavy feeders, so don’t skimp—this is what fuels those dramatic blooms.
Water at the base early in the morning to reduce evaporation and fungal risks. Avoid wetting the foliage, as damp leaves invite powdery mildew. You’ll know your dahlias are happy when they produce buds within 8-10 weeks of planting. Deadhead spent blooms regularly to encourage more flowers.
Tips & tricks for perfect dahlia planting
These little tricks will help you avoid the most common planting mistakes and set your dahlias up for a season of spectacular blooms.
Soak Like a Pro: The 2-4 hour soaking time in Step 1 is crucial, but don't just toss the corms in water and forget about them. Use lukewarm water—not cold tap water—that's about the temperature of a warm bath. I like to add a handful of compost to the water for extra nutrients. This boosts root growth and gives your dahlias a head start. After soaking, gently squeeze out excess water before planting—wet corms can rot if buried too damp.
Depth is Everything: When planting at 4-6 inches deep in Step 2, think of the corm like a potato—it needs to sit just below the soil surface with the "eyes" facing up. Too shallow and they'll bake in the sun; too deep and they'll struggle to emerge. I use a small trowel to create a pocket, place the corm gently, then fill with soil while tapping lightly to remove air pockets. For heavy clay soil, mix in some perlite or coarse sand to improve drainage.
Watering Wisdom: The first 4-6 weeks after planting are critical for establishing roots, but don't drown your corms. Water deeply right after planting, then check the soil daily—it should feel like a damp sponge, not a swamp. I set a timer to remind me to water every other day during dry spells. A simple trick: stick your finger an inch into the soil; if it feels dry, it's time to water. Mulch helps retain moisture, but don't pile it directly against the stems.
Pinching Pays Off: When your stems reach 12-18 inches in Step 4, pinching back the top leaves might seem counterintuitive, but it works wonders. This redirects energy from vertical growth to bushier stems with more flower buds. I wait until I see at least 4-5 leaves before pinching, and I always use clean, sharp scissors to avoid damaging the stems. You'll notice new side shoots forming within 2-3 weeks—these are your future blooms!
Pro Tips for Planting Dahlia Corms
- These little tricks will help you avoid the most common planting mistakes and set your dahlias up for a season of spectacular blooms.
- Soak Like a Pro: The 2-4 hour soaking time in Step 1 is crucial, but don't just toss the corms in water and forget about them.
- Depth is Everything: When planting at 4-6 inches deep in Step 2, think of the corm like a potato—it needs to sit just below the soil surface with the "eyes" facing up.
Frequently asked questions
Got questions about planting dahlia corms?
You’re not alone! Here are answers to the most common concerns—so you can grow show-stopping blooms with confidence.
When is the best time to plant dahlia corms?
Plant dahlia corms after the last frost when soil temperatures reach at least 60°F (15°C). In warm climates (zones 8-10), plant in early spring; in cooler zones, wait until late spring or early summer. Pro tip: If frost threatens, cover plants with mulch or frost cloth for extra protection!
How deep should dahlia corms be planted?
Plant corms 4–6 inches deep in well-draining soil, with the eyes (growth points) facing upward. Deeper planting prevents rot, while shallower depths help with faster sprouting. Bonus: Mix compost into the soil to boost nutrients and encourage vibrant blooms!
Can I plant dahlia corms too early?
Yes! Planting too early (when soil is still cold) can cause rot or slow growth. Wait until the ground warms up—stick your finger in the soil; if it’s below 55°F (13°C), hold off. Alternative: Start corms indoors in pots 4–6 weeks before the last frost for a head start!
What if my dahlia corms don’t sprout?
No sprouts? Check for rot (soggy soil), pests (slugs/snails), or improper depth. Ensure soil is moist (not waterlogged) and corms are planted with eyes up. Troubleshoot: Gently dig up and inspect for damage—if healthy, replant deeper. Patience pays off; some varieties take 2–3 weeks to emerge!
Can I plant dahlia corms in containers?
Containers work great—just use a 5–7 gallon pot with drainage holes. Plant 2–3 corms per pot, and place in full sun. Tip: Add a time-release fertilizer at planting for steady nutrition. Perfect for patios, balconies, or small gardens!
Wrapping up and next steps
Planting dahlia corms is your ticket to a show-stopping garden—just follow the timing and depth secrets we’ve shared! With the right prep, patience, and a little TLC, you’ll be rewarded with vibrant blooms that steal the show. 🌸
Now that you’re armed with the know-how, roll up your sleeves and get planting! Start with healthy corms, mark your calendar for the ideal timing (or use the frost chart as a guide), and watch your dahlias transform your outdoor space into a living masterpiece.
Happy digging—your future garden will thank you! 🌱