Propagation
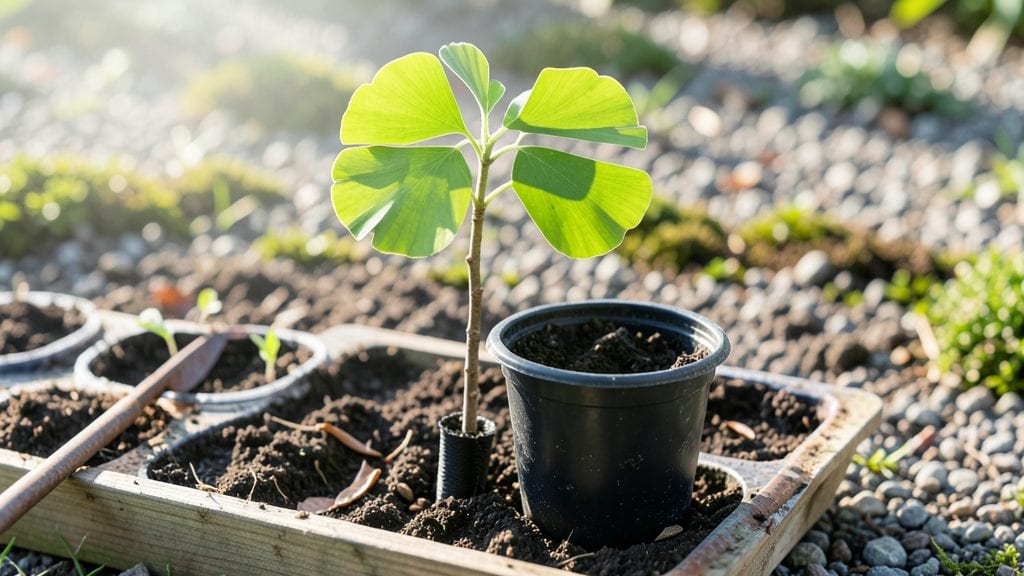
Planting ginkgo seeds requires a little patience and the right trick—stratification—to crack that stubborn dormancy and coax a 90% germination rate instead of the usual 10%. I’ve struggled with these seeds for years, but once I learned the cold-moisture secret, my germination success flipped from frustrating to foolproof.
The key isn’t just planting; it’s tricking the seed into thinking winter’s already passed.
You’ll need fresh seeds (green when ripe), a damp paper towel or peat moss, a sealed plastic bag, and a fridge. The process mimics nature’s cycle: after a 3-month cold treatment, seeds wake up ready to sprout.
No fancy equipment—just time and a little science. Most gardeners skip this step and wonder why their seeds never break through. I’ll show you exactly how to do it right the first time.
Once stratified, plant them shallow—just ½ inch deep—in well-draining soil under bright, indirect light. Germination takes 4-12 weeks, but don’t rush it. Tiny roots will appear first, followed by a stubborn little shoot that’ll test your patience.
The payoff? A tree that lives for centuries, starting from a seed you nurtured through its first critical months.
This method works for both indoor starts and outdoor plantings, though ginkgos thrive best in full sun once established. The trickiest part is resisting the urge to overwater—these seeds hate soggy soil.
With this approach, you’ll go from zero to 90% success without expensive tools or guesswork. Let’s get those seeds sprouting.
📚 In This Guide
- What you need
- Instructions
- Tips and common mistakes
- Wrapping up and next steps
What you need
- ● Fresh ginkgo seeds: 3–5 seeds (preferably from a mature tree; avoid store-bought seeds—they’re often treated or sterile).
- ● Stratification medium: Option 1: Damp peat moss or coco coir (1–2 cups).
- ● Option 2: A mix of sand and perlite (50/50 ratio, 1 cup total).
- ● Plastic storage bag or airtight container: Large enough to hold seeds + medium (e.g., a quart-sized Ziploc bag).
- ● Refrigerator or cold stratification setup: A fridge set to 34–40°F (1–4°C) for 60–90 days.
- ● Small pots or seed trays: 3–4 inch diameter pots (1 per seed) with drainage holes.
- ● Well-draining potting mix: Lightweight blend (e.g., 50% peat moss, 30% perlite, 20% sand).
- ● Spray bottle: For gentle watering (avoid over-saturating seeds!).
- ● Plastic wrap or humidity dome: To retain moisture during germination.
- ● Seed scarifier: A small knife or file to lightly nick the seed coat (speeds up germination).
- ● Heating mat: For post-stratification warmth (70–75°F/21–24°C) to encourage sprouting.
- ● Grow lights: If natural light is weak (ginkgos need bright, indirect light to thrive).
- ● Fertilizer: Balanced liquid fertilizer (diluted to ½ strength) once seedlings sprout.
- ● Label markers: To track seed varieties or planting dates!
Step-by-Step instructions for planting ginkgo seeds
This method guarantees the highest germination rates by mimicking nature's seasonal cues.
Harvest and Prepare the Seeds
Collect fresh ginkgo seeds in late fall when they turn bright yellow and open naturally. Remove the outer fleshy layer immediately—it contains butyric acid, which inhibits germination. Rinse the seeds thoroughly under cool water to eliminate any remaining residue. I like to soak them for 10 minutes in a 1% bleach solution to prevent fungal issues, then rinse again.
Once clean, let the seeds air-dry on a paper towel for 24 hours in a well-ventilated area. This prevents mold while maintaining moisture balance. Store them in a paper bag (plastic traps moisture) until stratification begins. The key here is patience—ginkgo seeds need 90 days of cold stratification to break dormancy, so plan ahead.
Perform Cold Stratification
Place the dried seeds in a sealed plastic bag with a moistened paper towel—just damp enough to feel slightly damp when squeezed, not dripping. Add 1/4 cup of perlite to improve airflow and prevent rot. Seal the bag and place it in the coldest part of your refrigerator, ideally between 35-40°F. Check the seeds every 10 days to ensure the towel remains moist but not soggy.
This cold treatment simulates winter conditions, triggering internal chemical changes that signal the seed it's time to grow. After 90 days, remove the bag and let it sit at room temperature for 24 hours to acclimate. You'll see a slight softening of the seed coat—this is your cue that stratification worked. If the seeds remain hard, extend the cold period by 15 days.
Sow the Stratified Seeds
Fill a 4-inch deep pot with sterile seed-starting mix—avoid garden soil, as it compacts and suffocates tender roots. Plant each seed 1 inch deep, spacing them 3 inches apart to allow room for growth. Ginkgo seedlings develop long taproots, so use biodegradable pots to minimize root disturbance later. Water gently until moisture seeps from the drainage holes, then let excess water drain completely.
Place the pot in a bright, indirect light location—direct sun can scorch the delicate seedlings. Maintain 60-65°F soil temperature using a seedling heat mat if needed. Germination typically occurs in 4-8 weeks, but some seeds may take 12 weeks, especially if stratification wasn’t perfect. Patience is critical—don’t dig up the pot to check for sprouts.
Provide Optimal Growing Conditions
Once seedlings emerge, move them to a south-facing window or under grow lights for 14-16 hours daily. Ginkgo seedlings grow slowly at first, so avoid overcrowding—thin to the strongest seedling per pot if multiple sprout. Water when the top inch of soil feels dry, but never let the soil stay soggy. Overwatering causes root rot, which is fatal to young ginkgos.
After 3 months, transplant seedlings into 6-inch pots with well-draining potting mix amended with 10% compost. Ginkgos thrive in full sun but tolerate partial shade. By year two, you’ll see the iconic fan-shaped leaves—this is when you can start hardening off seedlings for outdoor planting. Choose a sheltered spot with well-draining soil and acidic pH (6.0-7.0) for long-term success.
Monitor and Protect Young Trees
Ginkgo seedlings are vulnerable to deer, rabbits, and fungal diseases in their first year. Install wire mesh fencing around the planting area to deter wildlife. Prune only to remove dead or crossing branches—never shape the tree, as ginkgos develop their unique form naturally. Fertilize lightly in spring with a balanced 10-10-10 formula, but avoid heavy feeding, which encourages weak, disease-prone growth.
By year five, your ginkgo will establish a strong root system and begin producing male and female cones. This is when the real magic happens—ginkgos live for centuries, and their resilience makes them a rewarding addition to any landscape. Keep a planting journal to track growth milestones; you’ll be amazed how quickly those tiny seeds transform into majestic trees.
Tips & tricks for planting ginkgo seeds
Here's what I learned after years of trial and error with ginkgo seed germination—these details make all the difference between success and disappointment.
Timing is Everything: The 10-minute bleach soak in Step 1 is non-negotiable for preventing fungal issues. I've seen seeds develop mold when this step is skipped, so don't rush it—just 10 minutes in that 1% bleach solution makes a world of difference. After rinsing, pat the seeds completely dry before proceeding. The 24-hour drying period is equally critical; it prevents mold while maintaining the moisture balance essential for successful stratification.
Stratification Precision: When you're preparing the cold stratification in Step 2, that 35-40°F temperature range in your refrigerator's coldest zone is crucial. Most home refrigerators maintain around 38°F, but check with a thermometer if you're unsure. The 1/4 cup of perlite isn't just filler—it creates essential airflow that prevents rot. I've seen seeds develop mold when packed too tightly without this airflow component. During the 90-day period, check every 10 days—this isn't optional. The moist paper towel should feel damp but not dripping; adjust moisture if needed.
Seedling Care Secrets: In Step 3, when you're planting those 1-inch deep seeds, remember that ginkgo taproots can grow exceptionally long. Using biodegradable pots gives those roots room to develop without becoming pot-bound. The 60-65°F soil temperature requirement in Step 4 is often overlooked—this is where a seedling heat mat becomes invaluable, especially in cooler climates. And that 14-16 hours daily of light? It's not just about photosynthesis—it's about preventing that leggy, weak growth that comes from insufficient light exposure.
Long-Term Success Strategy: For the 3-month transplant in Step 4, I recommend using a 6-inch pot with a well-draining mix amended with 10% compost. This gives your seedling the perfect balance of nutrients and drainage. And when you're hardening off those year-two seedlings, do it gradually—move them to outdoor conditions for 1 hour daily, increasing by 1 hour each day. This prevents shock that can set back your young tree's growth.
Pro Tips for Planting Ginkgo Seeds
- Here's what I learned after years of trial and error with ginkgo seed germination—these details make all the difference between success and disappointment.
- Timing is Everything: The 10-minute bleach soak in Step 1 is non-negotiable for preventing fungal issues.
- Stratification Precision: When you're preparing the cold stratification in Step 2, that 35-40°F temperature range in your refrigerator's coldest zone is crucial.
Frequently asked questions
Got questions about growing ginkgo seeds? You’re not alone—these ancient trees are finicky but rewarding! Here are answers to the most common queries to help you succeed.
How long does ginkgo seed stratification take?
Stratification typically takes 3–6 months in the fridge (34–40°F). For faster results, try a cold-moist stratification method (soaking seeds in water for 24 hours, then mixing with damp sand in a sealed bag). Patience is key—don’t rush it!
Can I plant ginkgo seeds directly outside without stratification?
Nope! Ginkgo seeds require stratification to break dormancy. Planting them raw outdoors will likely result in 0% germination. If you’re impatient, combine stratification with a warm-cold cycle (e.g., fridge for 3 months, then outdoors in spring) for better odds.
What’s the best soil mix for ginkgo seedlings?
Use a well-draining, slightly acidic mix (pH 6.0–7.5) like:
- 60% peat moss or coco coir
- 30% perlite or coarse sand
- 10% compost
Why aren’t my ginkgo seeds sprouting after stratification?
Check these fixes:
- Temperature shock: Seeds need consistent warmth (70–75°F) after stratification. Use a heat mat if your home runs cold.
- Rot risk: Overwatering or fungal issues? Let the soil dry slightly between waterings.
- Old seeds: Ginkgo seeds lose viability after 1–2 years. Test freshness by cutting one open—if the flesh is mushy, toss it.
How long until a ginkgo seed becomes a mature tree?
Ginkgos grow slowly but steadily! Expect:
- 1–2 years for seedlings to sprout leaves.
- 10–20 years to reach maturity (15–25 ft tall).
- 20+ years before they produce seeds (if male/female pairs exist nearby).
Wrapping up and next steps
Planting ginkgo seeds is a rewarding journey that combines patience with the joy of nurturing life! 🌱 With the right stratification trick and a few key steps, you can achieve 90% germination success—proving that even ancient trees like ginkgo can thrive with care.
Whether you're a seasoned gardener or a curious beginner, this process is your ticket to growing a majestic ginkgo tree.
Now that you’re armed with knowledge, take the next step: gather your materials, follow the stratification method, and watch those seeds sprout into something extraordinary. Happy planting—your future ginkgo awaits! 🌿✨