Shrubs
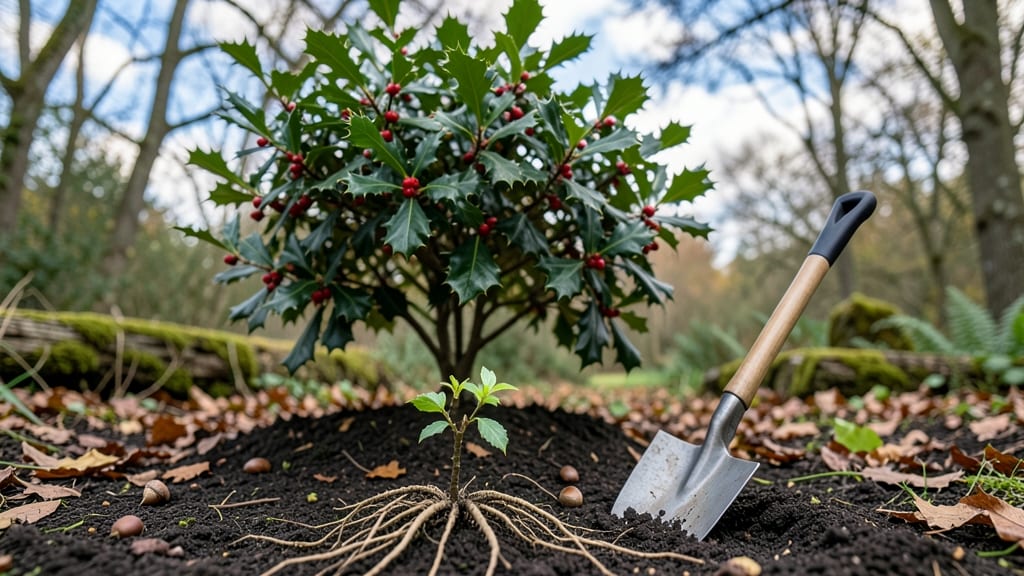
Planting holly bushes transforms your yard into a year-round green fortress, and I’ve found the 4-step method that actually works—no guesswork. The key? Matching the right variety to your climate and giving those roots room to stretch without fighting for space.
My first holly hedge nearly died because I crammed them too close; now I space them 6-10 feet apart for that lush, unbroken wall effect.
Start with well-draining soil—holly hates soggy feet—and mix in compost if your yard’s dirt feels like concrete. Evergreen types like ‘Nellie R. Stevens’ thrive in full sun, while deciduous varieties tolerate partial shade.
Dig holes twice as wide as the root ball but only as deep; planting too deep suffocates the roots, and you’ll end up with a sad, leggy bush instead of the dense screen you want.
After planting, water deeply to settle the soil, then mulch to keep moisture in and weeds out. Within a year, you’ll have a neighbor-envy hedge that stays vibrant even when your neighbors’ lawns turn brown.
The berries add that classic holiday touch, and the glossy leaves block noise like a natural soundproofing blanket.
For southern gardeners, choose heat-tolerant varieties like ‘Burford’ holly, while northern climates do better with cold-hardy types. And here’s my secret: fertilize lightly in early spring—just enough to encourage growth without burning the roots. That’s how you get a hedge that looks effortless, even if you’re still learning.
📚 In This Guide
- What you need
- Instructions
- Tips and common mistakes
- Wrapping up and next steps
What you need
- ● Holly bushes: 3–5 plants per 10 feet of space (depending on desired density and variety). Choose Ilex opaca (American holly) or Ilex × 'Nellie R. Stevens' for fast growth.
- ● Shovel: A sharp-edged spade (18–24 inches) for digging holes.
- ● Garden gloves: Heavy-duty to protect hands from thorns and soil.
- ● Pruning shears: Bypass pruners (for trimming roots and shaping plants).
- ● Compost or organic mulch: 2–3 inches of well-aged compost or shredded bark mulch.
- ● Watering can or hose: With a gentle spray nozzle for post-planting hydration.
- ○ Stakes (optional but recommended): 3–4 wooden or metal stakes per plant (6–12 inches tall) for support.
- ● Twig ties or soft plant ties: To secure stakes to young holly bushes.
- ● Soil amendment: Peat moss or coconut coir to improve drainage in heavy clay soils.
- ● Slow-release fertilizer: Balanced 10-10-10 or acidic fertilizer (e.g., Miracle-Gro Azalea, Camellia & Rhododendron) for a nutrient boost.
- ● Mulch mat: Landscape fabric to suppress weeds under mulch.
- ● pH test kit: To ensure soil pH is between 5.0–6.0 (holly thrives in acidic soil).
- ● Plant food spikes: For gradual nutrient release over time.
Planting holly bushes: evergreen privacy screen in 4 simple steps
Here's how to plant four holly bushes for a lush, year-round privacy screen that thrives with minimal fuss.
Choose the Right Location and Prepare the Soil
Holly bushes thrive in full sun to partial shade, so pick a spot that gets at least 4-6 hours of sunlight daily. They tolerate a range of soil types but grow best in well-draining, slightly acidic soil with a pH between 5.0 and 6.5. If your soil is heavy clay or overly alkaline, mix in 2-3 inches of compost or peat moss to improve drainage and acidity.
Dig a hole that’s twice as wide as the root ball but only as deep as the container. This extra width encourages roots to spread outward, creating a sturdy foundation. Gently loosen the sides of the hole with a shovel to prevent soil compaction around the roots later. If planting in a row, space each bush 6-10 feet apart for a dense, natural-looking screen.
Remove the Bush from Its Container and Inspect the Roots
Carefully remove the holly bush from its container and loosen any circling or tangled roots with your fingers. Holly roots are sensitive to damage, so avoid pulling or breaking them—this can stunt growth or even kill the plant. If the roots are tightly bound, use a knife to gently slice through any thick, tangled roots at the outer edges.
Place the bush in the hole so the top of the root ball sits level with the surrounding soil. Holly bushes hate having their roots buried too deep, which can suffocate them. Fill the hole with soil, pressing lightly around the edges to eliminate air pockets. Water deeply to settle the soil and help roots make contact with the earth.
Mulch and Water for Initial Establishment
Spread a 2-3 inch layer of mulch (like pine straw or shredded bark) around the base of the bush, keeping it 2-3 inches away from the trunk to prevent rot. Mulch helps retain moisture, regulate soil temperature, and suppress weeds—all critical for young holly bushes. Avoid piling mulch against the stem, as this can trap moisture and invite disease.
Water the bush deeply once a week for the first month, ensuring the soil is moist 6 inches down. Holly bushes are drought-tolerant once established, but young plants need consistent moisture to develop strong roots. You’ll know it’s time to water again when the top 2 inches of soil feel dry to the touch. Avoid overhead watering, which can spread fungal diseases.
Prune and Maintain for a Full, Healthy Screen
Holly bushes grow slowly, so prune in late winter or early spring before new growth begins. Remove any dead, diseased, or crossing branches first, then shape the bush by trimming back overgrown stems to maintain its natural form. Never cut into old wood—holly bushes produce berries on new growth, so pruning too aggressively reduces fruit production.
Fertilize lightly in early spring with a balanced, slow-release fertilizer (like 10-10-10) to encourage healthy growth. Over-fertilizing can lead to excessive foliage at the expense of berries. Monitor for pests like spider mites or scale insects, which can stress the plant. If you notice yellowing leaves or sticky residue, treat with neem oil or insecticidal soap as needed.
Tips & tricks for planting holly bushes
A few simple strategies will help your holly bushes grow into a thriving, dense privacy screen with minimal effort.
Soil Preparation Secret: Before planting, test your soil's pH with a simple kit available at garden centers. If your soil tests above 6.5, mix in sulfur or peat moss to lower the pH gradually over time. Holly bushes are particular about acidity—aim for that 5.0 to 6.5 range for optimal growth. I've seen bushes struggle in alkaline soil even when everything else looked perfect.
Root Care Technique: When loosening those tangled roots in Step 2, work gently but thoroughly. Holly roots are delicate, and any damage can set your plant back for months. If you notice roots growing in tight circles around the root ball, make small vertical cuts with a clean knife to encourage outward growth. This might seem drastic, but it prevents future root strangulation as your bush matures.
Watering Wisdom: The first month is critical for root establishment, so don't skip that weekly deep watering. Use your finger to check soil moisture—if the top 2 inches feel dry, it's time to water. For a more precise check, insert a long screwdriver into the soil. If it comes out clean, you're good; if it comes out with clumps of soil, water again. This method ensures you're reaching that 6-inch depth consistently.
Mulching Strategy: That 2-3 inch layer of mulch serves multiple purposes beyond just looks. In summer, it keeps roots cool during heatwaves, and in winter, it provides insulation against freezing temperatures. For extra protection in cold climates, add an additional 1-2 inches of mulch in late fall. Just remember to keep it clear of the trunk to prevent rot—a common mistake that can kill young bushes.
Pro Tips for Planting Holly Bushes
- A few simple strategies will help your holly bushes grow into a thriving, dense privacy screen with minimal effort.
- Soil Preparation Secret: Before planting, test your soil's pH with a simple kit available at garden centers. If your ...
- Root Care Technique: When loosening those tangled roots in Step 2, work gently but thoroughly. Holly roots are delica...
Frequently asked questions
Got questions about planting holly bushes? You’re not alone! Here are some of the most common concerns—plus quick, practical answers to help you get started with confidence.
When is the best time to plant holly bushes?
The ideal window is early spring or fall, when soil is workable but not frozen. Spring planting gives roots time to establish before summer heat, while fall offers cooler temps and moisture. Avoid planting in peak summer or winter—extreme temps stress young bushes.
How far apart should I space holly bushes for a privacy screen?
For a dense, lush screen, plant holly bushes 4 to 6 feet apart. If you’re using dwarf varieties (like Ilex ‘Dwarf Burford’), reduce spacing to 3 to 4 feet. Remember: hollies grow slowly—give them room to fill in over 3–5 years!
Do holly bushes need full sun, or can they grow in partial shade?
Most hollies thrive in full sun (6+ hours/day), but varieties like ‘Nellie R. Stevens’ tolerate partial shade (3–6 hours). If planting in shadier spots, expect slower growth and fewer berries. Test your site first—hollies in deep shade may stretch or lose their glossy leaves.
Why aren’t my holly bushes producing berries?
Holly berries appear only on female plants, which need a nearby male pollinator (even if it’s another variety). If you planted only females, add a male bush within 30 feet. Other culprits: poor soil, drought stress, or young age (berries take 2–5 years to develop).
Can I plant holly bushes in containers instead of the ground?
Yes! Dwarf hollies (like ‘Sky Pencil’) thrive in 5-gallon+ containers with well-draining soil. Use a mix of potting soil and compost, and ensure the pot has drainage holes. Repot every 2–3 years, and move containers to avoid winter frost or summer heat extremes.
How do I protect holly bushes from deer or rabbits?
Deer and rabbits love holly leaves! Use physical barriers like chicken wire (wrapped around trunks) or repellents (like hot pepper spray). Planting near thorny shrubs (e.g., roses, barberry) can also deter browsers. If all else fails, consider deer-resistant varieties like ‘Blue Prince’.
Wrapping up and next steps
Planting holly bushes is a rewarding way to add year-round beauty, privacy, and wildlife appeal to your landscape. With the right location, soil prep, and care, these evergreens will thrive and become a stunning focal point. Now that you’re equipped with the knowledge, grab your gloves and get planting! 🌱
Next Steps:
- Mark your calendar for seasonal pruning (late winter/early spring) to keep your holly lush.
- Watch for pests like spider mites—early intervention keeps your bushes healthy.
- Share your progress! Snap photos of your holly’s growth and tag us—we love seeing your green thumbs in action.