Container Gardens
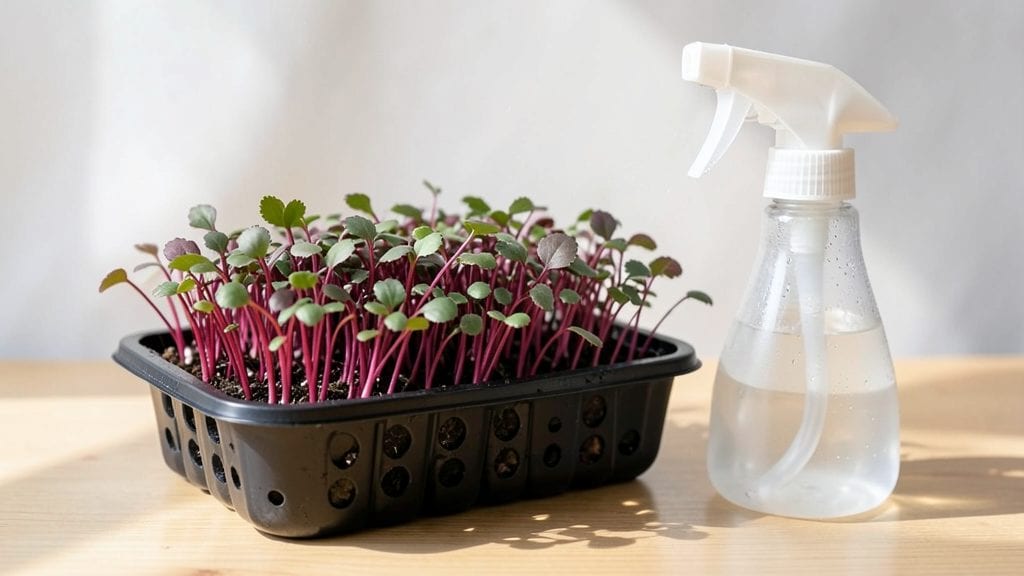
Planting microgreens indoors is the fastest way to turn a sunny windowsill into a 7-day harvest of peppery greens and tender shoots—no garden required.
I learned this trick after paying $8 for a sad bunch of store-bought microgreens and realizing how easy it is to grow them myself for a fraction of the cost. The secret lies in the right seeds, a shallow container, and a little patience while they race toward the light.
You only need three things to start: a shallow tray or container with drainage, a high-quality microgreen seed blend, and a spray bottle for gentle watering. No fancy tools, no soil mountains—just a flat surface and a sunny spot.
My first batch used an old cake pan and a handful of radish seeds, and within a week, I had enough greens to top sandwiches, salads, and even smoothies. The best part? You can grow them year-round, regardless of outdoor weather.
By day 7, you’ll be harvesting bright, flavorful greens that pack more nutrients than their mature counterparts. The texture is crisp, the flavor intense, and the satisfaction of growing something in just a week is unmatched.
Plus, you’ll avoid the mold risks that come with overwatering by using the right technique—just enough moisture to keep seeds damp, not soggy. This method works for any sunny kitchen, balcony, or even a basement with a grow light.
Once you master the basics, you can experiment with different varieties like broccoli, sunflower, or pea shoots—each with its own unique flavor and color. The key is consistency in light and water, and before you know it, you’ll have a never-ending supply of fresh greens without ever leaving the house.
Ready to try it?
📚 In This Guide
- What you need
- Instructions
- Tips and common mistakes
- Wrapping up and next steps
What you need
- ● Microgreen seeds (1–2 lbs, organic preferred): Sunflower
- ● Radish
- ● Broccoli
- ● Pea shoots
- ● Amaranth
- ● Growing trays (10"x20" or 10"x10" with drainage holes, 2–4 trays)
- ● Growing medium: Hemp mats (1–2, reusable) OR
- ● Organic potting soil (2–3 cups, seed-starting mix)
- ● Spray bottle (8–16 oz, with fine mist nozzle)
- ● Grow lights (LED or fluorescent, 12–16" height, 12–16 hrs/day)
- ● Scissors or harvesting knife (for clean cuts)
- ● Humidity dome (to retain moisture in early stages)
- ● pH testing kit (ideal soil pH: 6.0–7.0)
- ● Fertilizer (diluted fish emulsion or seaweed extract, 1 tsp/gallon)
- ● Thermometer/hygrometer (ideal temp: 60–75°F, humidity: 40–60%)
- ● Food-safe storage containers (for harvested greens)
Step-by-Step instructions for planting microgreens indoors
Here's how to grow vibrant microgreens in just a week using minimal space and supplies.
Prepare Your Growing Trays and Soil
Start by lining your 4 shallow trays with 4 sheets of paper towels, ensuring they cover the bottom completely. This prevents soil from falling out and helps with drainage. Next, fill each tray with 4 cups of moistened potting mix, spreading it evenly to create a ¼-inch thick layer. Press down lightly with your fingers until the soil is firm but not compacted—this ensures good seed-to-soil contact.
Use lukewarm water to moisten the potting mix, as cold water can slow germination. The soil should feel damp like a wrung-out sponge, not soggy. If it crumbles when squeezed, it’s ready. Avoid overwatering now; excess moisture can suffocate seeds before they sprout.
Sow Seeds Evenly for Uniform Growth
Choose 4 types of microgreen seeds—such as radish, broccoli, sunflower, or pea shoots—and scatter them evenly across each tray. Aim for a density of about ½ teaspoon per tray, spreading them thinly so they don’t overlap. For larger seeds like sunflower, space them ½ inch apart to prevent crowding.
Gently press the seeds into the soil with your fingers or a small tool, ensuring they make contact but aren’t buried deeper than ⅛ inch. This shallow placement encourages quick germination. If you’re using fine seeds like radish, a light mist with a spray bottle works best. Label each tray to track varieties—trust me, they’ll all look the same at first.
Cover and Provide Ideal Germination Conditions
Place a humidity dome or plastic wrap over each tray to retain moisture and warmth. Microgreens thrive in 70-75°F conditions, so position them in a spot away from drafts or direct heat sources. If your kitchen stays cooler, a seedling heat mat under the trays speeds up germination. Keep them in bright, indirect light for now—direct sun can scorch tiny seedlings.
Check daily for condensation on the dome. If it’s foggy, leave it on; if it’s dry, mist the soil lightly and reseal. Germination typically takes 2-4 days, but some varieties like pea shoots may take up to 5 days. You’ll know it’s time to remove the dome when 50% of seeds have sprouted—this prevents mold from forming on damp soil.
Provide Light and Water for Rapid Growth
Once sprouts emerge, move the trays to a south-facing window or under grow lights for 12-14 hours of light daily. Microgreens grow fast, so keep them within 6 inches of the light source to prevent leggy, weak stems. If using natural light, rotate trays quarter-turn daily so they grow straight. You’ll see first true leaves (not the initial seed leaves) in 3-4 days—this is your cue to start watering more carefully.
Water from the bottom by placing trays in ½ inch of water for 10-15 minutes daily. This method ensures roots absorb moisture without disturbing delicate shoots. Avoid overhead watering, which can spread disease. Harvest when microgreens reach 1-2 inches tall, usually within 7 days total. Use clean scissors to snip just above the soil line for a clean cut.
Harvest and Store for Maximum Freshness
Harvest in the morning after watering, when microgreens are crispest. Cut just above the soil with sharp scissors to encourage a second harvest if desired. Rinse gently under cool water to remove soil, then drain on a clean towel. Store in an airtight container with a paper towel to absorb excess moisture. Keep refrigerated for up to 5 days, or freeze in ice cube trays for longer storage.
This method delivers 4 servings of nutrient-packed greens in under a week—perfect for adding freshness to salads, sandwiches, or garnishes. The key is consistency: light, warmth, and moisture at every stage. Skip shortcuts here, and you’ll get the fastest, healthiest microgreens possible.
Tips & tricks for perfect microgreen growth indoors
Microgreens may seem simple, but these small details make all the difference between thriving greens and disappointing results. Let me share what I've learned after growing dozens of batches indoors.
The Soil Preparation Secret: In Step 1, when you're creating that ¼-inch layer of moistened potting mix, don't just eyeball it—use a straight edge or ruler to ensure even thickness. Uneven soil layers lead to inconsistent germination, where some seeds get too much moisture while others dry out. I've found that pressing the soil gently with the back of a spoon creates just the right firmness for good seed-to-soil contact without compacting it too tightly.
Seed Spacing Strategy: The ½-inch spacing for larger seeds like sunflower might seem generous, but trust me on this—crowded seeds compete for nutrients and light, resulting in weak, leggy stems. For smaller seeds like radish, I've discovered that a light mist from a spray bottle (rather than pressing them in) creates better contact with the soil while preventing damage to delicate seed coats.
Lighting Optimization: Those crucial 12-14 hours of daily light deserve special attention. If you're using natural light, position your trays within 6 inches of the window but avoid direct sunlight during peak hours (10am-4pm) which can scorch tender sprouts. For artificial lighting, LED grow lights are ideal—they emit the full spectrum of light that microgreens need, and you can position them just 4-6 inches above the trays for optimal growth without overheating.
Harvest Timing Precision: The 1-2 inch height guideline is perfect, but here's what I've learned: harvest in the morning after watering when the greens are at their crispest. Use clean, sharp scissors to cut just above the soil line—this clean cut prevents the stems from becoming bitter and encourages a second flush of growth if you're willing to wait another 3-4 days. The key is consistency in light and watering that we established earlier.
Pro Tips for Planting Microgreens Indoors
- Microgreens may seem simple, but these small details make all the difference between thriving greens and disappointing results.
- The Soil Preparation Secret: In Step 1, when you're creating that ¼-inch layer of moistened potting mix, don't just eyeball it—use a straight edge or ruler to ensure even thickness.
- Seed Spacing Strategy: The ½-inch spacing for larger seeds like sunflower might seem generous, but trust me on this—crowded seeds compete for nutrients and light, resulting in weak, leggy stems.
Frequently asked questions
How much light do microgreens need indoors?
Microgreens thrive with 12–16 hours of bright light daily. A sunny windowsill works, but for faster growth, use a grow light (LED or fluorescent) 4–6 inches above the tray. South-facing windows are ideal, but rotate trays daily for even exposure. Pro tip: If leaves stretch (called etiolation), they’re not getting enough light!
Can I harvest microgreens in just 7 days?
Yes! Fast-growing varieties like radish, broccoli, or sunflower can be ready in 7–10 days with optimal conditions (warmth, light, and moisture). Slower growers (e.g., pea shoots) may take 2–3 weeks. Start with small batches to test timing—harvest when the first true leaves appear (usually 1–2 inches tall).
Why are my microgreens moldy or leggy?
Mold (fuzzy spots) or leggy stems usually mean too much moisture or poor airflow. Fix it by:
- Watering: Mist lightly (don’t soak) and drain excess water immediately.
- Airflow: Use a small fan on low for 10–15 mins daily.
- Spacing: Thin crowded sprouts to reduce humidity.
Leggy greens? Boost light or move them closer to the window.
How do I store harvested microgreens?
Store microgreens in an airtight container with a paper towel to absorb moisture. Keep them in the fridge for 5–7 days, but eat them fresh for peak flavor! For longer shelf life, wash and dry them thoroughly before storing. Freezing isn’t recommended—they’ll lose texture and nutrients.
What’s the cheapest way to start microgreens indoors?
Skip fancy setups! Use:
- Containers: Repurpose shallow trays, egg cartons, or even old takeout containers with drainage holes.
- Seeds: Buy bulk organic seeds online or from garden stores (as little as $5 for 1 lb).
- Light: A $15–$20 LED bulb or a well-lit kitchen window works.
Start with radish or mustard greens—they’re fast, cheap, and hardy!
Wrapping up and next steps
Growing microgreens indoors is a rewarding, fast, and space-efficient way to bring fresh, nutrient-packed greens to your kitchen in just seven days! With minimal supplies and a little care, you’ll enjoy crisp, vibrant harvests year-round—no garden required. 🌱
Ready to dive in? Start with a single tray of your favorite variety, like peppermint radish or sunflower, and let your green thumb shine. Next step: Experiment with flavors, share your harvest with friends, or even scale up to a full indoor garden!
The possibilities are as endless as your creativity.