Container Gardens
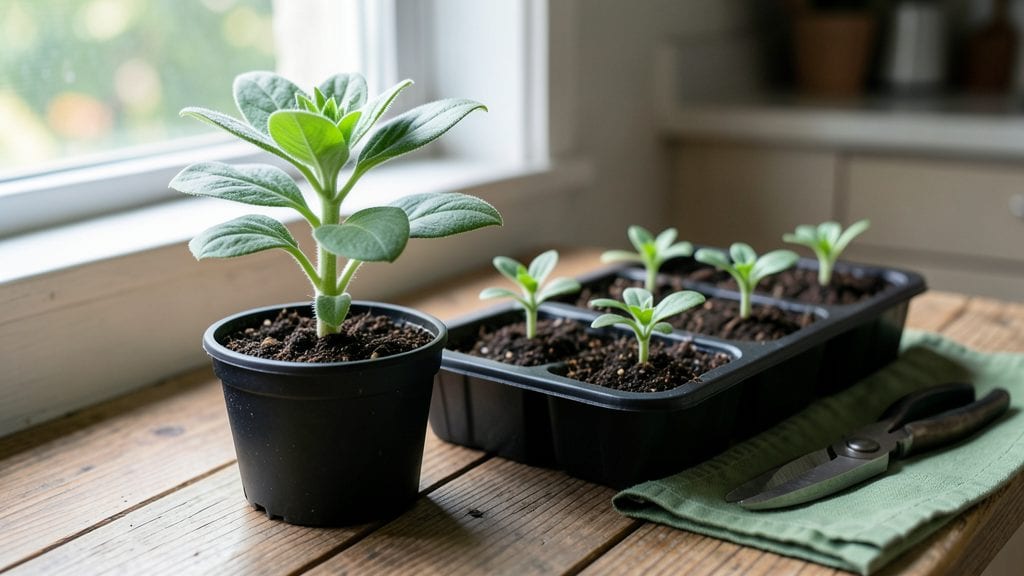
Planting zinnias indoors lets you enjoy their bold colors year-round without needing a backyard. 🌻 I’ve grown them in tiny apartments with just a sunny windowsill and a few simple supplies—no greenhouse or fancy setup required.
The key is starting with fresh seeds and giving them the right light from day one, whether that’s a south-facing window or a grow light.
You’ll need a shallow container with drainage holes, lightweight potting mix, and a way to keep the soil consistently moist but not soggy. Zinnias germinate quickly, often within a week, and they reward patience with vibrant blooms in just 6-8 weeks.
The trick is spacing them properly so they don’t get crowded, which stunts growth and reduces flowers.
By the time spring rolls around, you’ll have sturdy seedlings ready to transplant outside—or keep them indoors for continuous color. The blooms stay bright and cheerful all season, and you’ll get more flowers than most store-bought plants.
Plus, zinnias attract pollinators even in small spaces, turning your windowsill into a mini ecosystem.
Works for any indoor setup, from bright kitchens to dimmer corners with supplemental lighting. Here’s how to make it work without the usual struggles—no black thumbs required.
📚 In This Guide
- What you need
- Instructions
- Tips and common mistakes
- Wrapping up and next steps
What you need
- ● Zinnia seeds: Choose compact varieties like 'Thumbelina' or 'Crystal' (1–2 packets, ~50–100 seeds total).
- ● Containers: 1–2 drainage trays (5–6" deep) or window boxes (with drainage holes!).
- ○ Optional: Self-watering pots for low-maintenance care.
- ● Potting mix: 2–3 quarts of lightweight, well-draining mix (e.g., 50% peat moss + 50% perlite or coco coir).
- ● Grow lights or sunny windowsill: South-facing window (6+ hours of direct sun daily) or
- ● 1 LED grow light (12–16 hours/day, 12" above plants).
- ● Watering can or spray bottle: With a fine rose nozzle for gentle hydration.
- ● Fertilizer: Balanced liquid fertilizer (10-10-10 or 20-20-20, diluted to half-strength).
- ○ Optional: Slow-release granules mixed into soil at planting.
- ● Temperature: Keep indoors at 65–75°F (18–24°C)—zinnias love warmth!
- ● Humidity: 40–60% (use a humidifier or pebble tray if air is dry).
- ● Patience: Germination takes 7–14 days—stay consistent with moisture!
- ● Space: Ensure containers are spaced 6–12" apart for airflow (zinnias hate soggy roots!).
Step-by-Step instructions for planting zinnias indoors
Here’s how to grow vibrant zinnias indoors—no greenhouse needed.
🌱 Step 1: Prepare Containers and Soil
Fill your 4-inch pots with the 2 gallons of seed-starting mix—this lightweight blend drains well and prevents soggy roots, which zinnias hate. Press the soil down gently with your fingers to remove air pockets, but don’t compact it too tightly. You want it fluffy enough for tiny roots to spread easily.
Zinnias germinate best in warm soil, so place the pots in a sunny windowsill or on a seedling heat mat set to 70-75°F. If you’re using the heat mat, keep it on for 7-10 days until sprouts appear. Without one, germination might take a few extra days—just be patient.
🌱 Step 2: Sow Seeds Correctly
Sprinkle 2-3 seeds per pot, pressing them ¼ inch deep into the soil. Sowing too deep slows germination because the seedling struggles to reach light. Cover lightly with a thin layer of extra mix—just enough to hide the seeds, no more.
Mist the soil surface with a spray bottle until it’s evenly damp. Avoid soaking it; zinnias rot quickly if their roots sit in water. Place a clear plastic dome or wrap a plastic bag loosely over the pots to trap warmth and moisture. Check daily for condensation—if the bag fogs up, remove it for 10 minutes to prevent mold.
☀️ Step 3: Provide Bright Light Immediately
The moment those first green shoots break through the soil, move the pots to the brightest window you have—south-facing is ideal. Zinnias need 6-8 hours of direct sunlight daily, or they’ll stretch toward the light with weak, leggy stems. If your window isn’t sunny enough, supplement with a grow light kept 4 inches above the seedlings.
Rotate the pots a quarter turn every few days so they grow straight instead of leaning. You’ll notice strong seedlings have bold green leaves and thick stems—if yours look pale or stretched, they’re not getting enough light. Adjust the light source or move the pots closer.
💧 Step 4: Water and Fertilize for Strong Growth
Wait until the top inch of soil feels dry before watering again—zinnias despise soggy roots. Water gently at the base of the plant to avoid wetting the leaves, which can cause fungal issues. Use the 1 teaspoon of liquid fertilizer mixed with 1 gallon of water every 2 weeks once the seedlings have 2 sets of true leaves. This gives them the nutrients they need to bloom.
Pinch off the top set of leaves when the seedlings are 4-5 inches tall to encourage bushier growth. This might seem counterintuitive, but it forces the plant to branch out instead of growing tall and spindly. You’ll see new side shoots emerge within a week—that’s your signal it’s working.
⏰ Step 5: Transplant Outdoors When Ready
Once nighttime temperatures stay above 50°F and there’s no frost in the forecast, it’s time to move your zinnias outside. Harden them off by placing the pots in a shaded, sheltered spot for 3-5 days, gradually increasing their time outdoors each day. This prepares them for the bigger temperature swings they’ll face in the garden.
When transplanting, dig a hole twice as wide as the pot but the same depth. Gently remove the seedling, place it in the hole, and fill in with soil, pressing lightly around the base. Water deeply right after planting to help the roots settle. Your zinnias will start blooming in 6-8 weeks, giving you vibrant color all season long.
Tips & tricks for perfect indoor zinnia growth
These simple tricks will help you avoid common pitfalls and get those zinnias blooming like a pro—even in small spaces.
The Heat Factor: That 70-75°F soil temperature in Step 1 is critical for germination, but here's what nobody tells you—zinnias also love warmth after sprouting. Once your seedlings emerge, keep them in a spot where daytime temps stay between 70-80°F. If your home runs cooler, a small space heater near the plants (not too close!) can make all the difference.
Lighting Secret: Those 6-8 hours of direct sunlight in Step 3 are non-negotiable, but here's the thing: most windows don't provide enough. If your seedlings start stretching toward the light (a condition called "legginess"), it's too late to fix it. Instead, supplement immediately with a grow light on a timer for 12-14 hours daily. I've seen zinnias go from sad and spindly to strong and bushy in just 3 days with proper light.
Watering Wisdom: The "top inch dry" rule in Step 4 is perfect, but here's my pro tip: use room temperature water. Cold water shocks the roots, while warm water can encourage mold growth. Fill a spray bottle with water and let it sit out for an hour before using it—your zinnias will thank you with healthier growth. I also add a drop of liquid seaweed fertilizer to my watering can for extra nutrients without changing the recipe.
Transplant Timing: Those 3-5 days of hardening off in Step 5 are crucial, but don't rush it. I've made the mistake of moving zinnias outside too soon, and they wilt dramatically. Start with just 1 hour outside on day 1, then gradually increase by 1 hour each day. Watch for signs of stress—if leaves start curling, they're not ready yet.
Pro Tips for Planting Zinnias Indoors
- These simple tricks will help you avoid common pitfalls and get those zinnias blooming like a pro—even in small spaces.
- The Heat Factor: That 70-75°F soil temperature in Step 1 is critical for germination, but here's what nobody tells you—zinnias also love warmth after sprouting.
- Lighting Secret: Those 6-8 hours of direct sunlight in Step 3 are non-negotiable, but here's the thing: most windows don't provide enough.
Frequently asked questions
Got questions about growing zinnias indoors?
You’re not alone! Here are answers to the most common queries to help you cultivate vibrant blooms in your home.
Can zinnias grow indoors without sunlight?
Zinnias need bright light to thrive—at least 6–8 hours of direct sunlight daily. If natural light is scarce, supplement with a grow light (LED or fluorescent) 12–16 inches above plants. South-facing windows work best, but east or west exposures can still work with extra light. Without enough light, stems stretch (called etiolation) and blooms fade.
How long does it take for indoor zinnias to flower?
Indoor zinnias typically bloom 6–10 weeks after planting, depending on the variety and growing conditions. Dwarf varieties (like ‘Thumbelina’) may flower faster (4–6 weeks), while taller types (like ‘Benary’s Giant’) take longer. Pinch back the first few blooms to encourage bushier growth—this can delay initial flowers but leads to a longer, fuller display!
Why are my indoor zinnias wilting or dying?
Wilting zinnias usually signal one of three issues: overwatering (check soil moisture—it should dry slightly between waterings), underwatering (drooping leaves mean thirsty roots), or temperature stress (keep them between 60–75°F). Yellow leaves? It might be overwatering or nutrient deficiency. Brown edges? Low humidity or fluoride in tap water (use distilled or rainwater instead).
What’s the best indoor alternative if zinnias are too tricky?
If zinnias prove too finicky, try these low-maintenance indoor bloomers:
- Geraniums – Thrives in bright light, drought-tolerant, and blooms nonstop.
- Calceolarias – Loves indirect light, compact, and flowers winter-long.
- African violets – Hardy, colorful, and forgiving of less-than-perfect care.
- Begonias – Prefers humidity and indirect light; great for bathrooms or kitchens.
Do I need to fertilize zinnias grown indoors?
Yes! Indoor zinnias hungry for nutrients deplete soil faster than outdoor plants. Use a balanced liquid fertilizer (like 10-10-10) every 2–4 weeks during the growing season. Pro tip: Dilute fertilizer to half-strength to avoid burning roots. Stop fertilizing in fall/winter when growth slows. Organic options like fish emulsion or compost tea also work!
Still stumped? Drop your zinnias’ struggles in the comments—we’re happy to help troubleshoot!
Wrapping up and next steps
Growing zinnias indoors is a rewarding way to bring vibrant color and life into your space—no green thumb required! 🌸 With the right containers, sunlight, and care, you’ll enjoy cheerful blooms year-round. Start small, experiment with varieties, and don’t hesitate to troubleshoot along the way.
Ready to dive in? Pick your favorite zinnia seeds or cuttings today and begin your indoor gardening adventure. Whether you’re a beginner or a seasoned plant parent, every step is a chance to nurture beauty—and maybe even inspire others to try! 🌱