Pruning
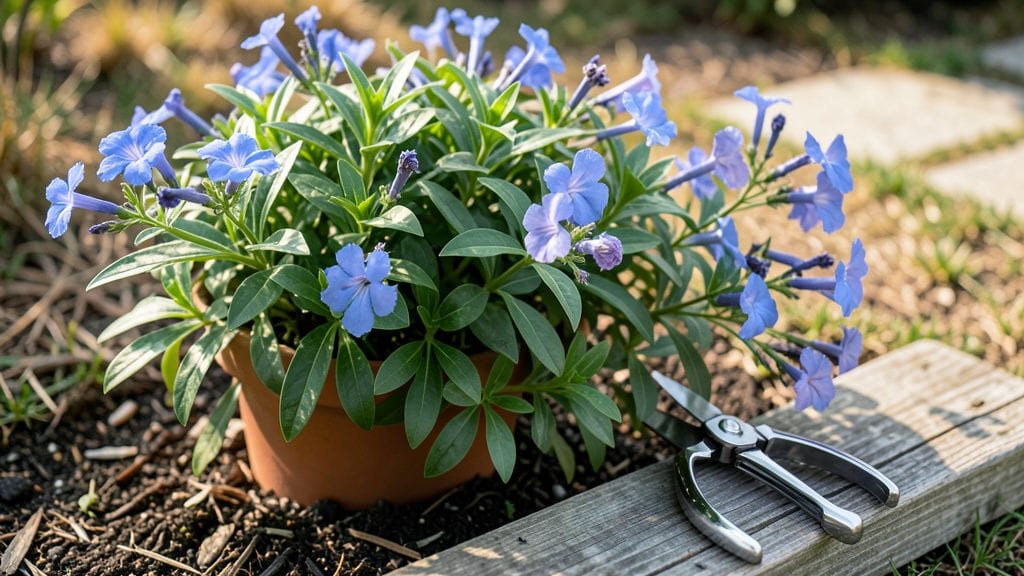
Pruning plumbago plants turns leggy, sparse bushes into bushy, bloom-covered powerhouses—and I’ve learned the exact timing and cuts that make the difference. The key is cutting back by one-third in early spring, then light trims throughout summer to keep flowers coming.
My plumbago used to look like a sad stick until I discovered this method, and now it’s the first thing neighbors notice when they walk by.
You’ll need sharp bypass pruners, a pair of gloves, and a sunny morning to work—plumbago blooms best when pruned just as new growth starts. The goal is to shape the plant into a rounded form while removing any dead or crossing branches.
Think of it like sculpting: you’re guiding where energy goes, and that’s what triggers those vibrant blue blooms all season long.
After pruning, your plumbago will reward you with fresh new shoots within 2-3 weeks, followed by nonstop blooms from late spring through fall. The secret is consistency: a little trim every 6-8 weeks keeps the plant compact and productive.
Over-prune, and you’ll stunt growth; under-prune, and you’ll miss out on that lush, bushy look.
This works for both plumbago auriculata (the classic trailing type) and plumbago capensis (the upright variety), though the upright type benefits from a slightly harder cut back in spring.
Whether you’re dealing with a container plant or a garden border, the same principles apply—just adjust the height you aim for based on your space.
📚 In This Guide
- What you need
- Instructions
- Tips and common mistakes
- Wrapping up and next steps
What you need
- ● Pruning shears: Bypass pruners (sharp, 5-7" blades) for clean cuts on stems up to ½". Anvil pruners (for thicker stems) if your plant has woody growth.
- ● Hand pruners: Bypass or ratcheting for smaller branches (avoid dull tools—split ends invite disease!).
- ● Gloves: Garden gloves (nitrile-coated for grip and protection from thorns or sap).
- ● Disinfectant: 70% isopropyl alcohol or bleach solution (1:9 ratio) to sterilize tools between cuts (prevents fungal spread).
- ○ Pruning saw: Curved-blade saw (optional but handy for thick, stubborn stems >1" diameter).
- ● Garden twine or ties: For securing large branches during pruning (if needed).
- ● Loppers: Long-handled bypass loppers for hard-to-reach branches (8-12" reach).
- ● Hose or spray bottle: To rinse tools/sap off hands post-pruning.
- ● Plant food: Balanced fertilizer (10-10-10) or compost to nourish your Plumbago after trimming.
- ● Mulch: Organic mulch (e.g., shredded bark) to retain moisture and protect roots.
- ● Notebook & pen: To jot down pruning notes (e.g., "pruned ⅓ of plant in March").
How to prune plumbago for continuous, vibrant blooms
This method keeps your plumbago bushy and flowering all season—no more leggy stems or sparse blooms.
Time Your First Pruning for Spring Growth
Wait until after the last frost when new growth appears—usually mid to late April in most climates. You'll see fresh, bright green shoots emerging from the base of the plant. This is your signal that the plant has broken dormancy and is ready for shaping.
Use clean, sharp pruning shears to cut back one-third of the oldest stems to just above a leaf node or bud. This encourages new growth from the base, which produces more flowers. Avoid cutting into woody stems—focus on the flexible, green growth. I always prune on a dry morning so the cuts heal faster.
Trim After Each Flowering Cycle
Plumbago blooms in waves, so prune 2-3 times per season—after each major flush of flowers. Look for clusters of spent blooms turning brown or wilting; this is your cue to act. Cut back just above the next set of leaves where new growth can emerge.
Never remove more than one-third of the plant at a time. This prevents shock and ensures the plant keeps producing flowers. If you see leggy growth reaching outward, trim those stems too—it keeps the plant compact and encourages bushier growth. I like to step back and assess the shape; symmetry helps the plant look its best.
Lightly Prune for Airflow in Summer
During July and August, focus on maintaining airflow within the plant. Use your fingers to gently separate any crowded stems—this prevents fungal issues like powdery mildew. If you notice any dead or diseased branches, remove them immediately with sterilized shears.
Lightly pinch back the tips of new growth to encourage branching. This is where you’ll see the most difference in a few weeks—thicker growth means more blooms. Avoid heavy pruning now; the plant is in its peak flowering phase, and drastic cuts can reduce blooms. Instead, just tidy up and remove any stems that are crossing or rubbing against each other.
Prepare for Winter Dormancy
When temperatures drop below 50°F at night, stop pruning entirely. The plant is entering dormancy, and cutting now can stimulate new growth that won’t survive the cold. Instead, focus on cleaning up—remove all dead leaves and stems to reduce disease risk over winter.
If you’re in a colder climate where plumbago dies back to the ground, you can cut it back by half in late fall. This makes it easier to cover with mulch or protect from frost. In milder areas, just trim back any damaged or weak stems. I always leave the plant slightly taller than the pot edge—this helps protect the base from frost heave.
Revive and Reshape in Early Spring
As soon as you see new growth in early spring, give your plumbago a final trim to shape it for the season. Cut back any overly long or leggy stems to just above a leaf node. This isn’t about drastic changes—just a light touch to encourage even growth.
Apply a balanced 10-10-10 fertilizer after pruning to support new growth. Water deeply but avoid soaking the plant—plumbago prefers slightly dry conditions. Within a few weeks, you’ll see fresh, vibrant growth, and the blooms will return stronger than ever. This is the moment that sets the tone for the entire season.
Tips & tricks for perfect plumbago pruning
A few key strategies will transform your pruning routine from guesswork to garden artistry. These insights come from years of watching plumbago respond to different approaches—some worked beautifully, others left me with sparse blooms and leggy stems.
The Spring Timing Secret: That mid-to-late April window for your first pruning is critical because it aligns with the plant's natural growth cycle. I've learned the hard way that pruning too early can damage new shoots still vulnerable to frost, while waiting too long lets the plant develop woody stems that are harder to shape. Look for those bright green shoots emerging from the base—they're your green light to begin. Confession: I skipped this step for years and wondered why my plumbago never looked full.
Pruning Ratio That Works: The one-third rule isn't arbitrary—it's based on how much stress the plant can handle while still producing flowers. When I first started, I'd often remove too much, thinking more pruning meant more blooms. In reality, you're creating a shock that reduces flowering. That said, if your plant looks particularly leggy, you can gently remove up to half of the oldest stems in one session—just space these out over multiple pruning sessions to avoid overwhelming the plant.
Summer Airflow Technique: During July and August, I've found that using your fingers to separate crowded stems is more effective than cutting. This gentle approach maintains the plant's structure while improving airflow. I sterilize my shears with rubbing alcohol between cuts to prevent spreading any potential diseases. The key is to work when the plant is dry—this helps any small cuts heal faster and reduces the risk of fungal infections that can ruin your summer blooms.
Winter Protection Insight: The 50°F nighttime temperature threshold is where plumbago starts its dormancy process. I've noticed that plants in containers are more vulnerable to cold damage, so I always move potted plumbago to a sheltered location or cover them with frost cloth. In colder climates, that late fall half-pruning is essential—it prevents the plant from being too tall for winter protection methods like mulch or frost blankets.
Pro Tips for Plumbago Plant Pruning
- A few key strategies will transform your pruning routine from guesswork to garden artistry. These insights come from ...
- The Spring Timing Secret: That mid-to-late April window for your first pruning is critical because it aligns with the...
- Pruning Ratio That Works: The one-third rule isn't arbitrary—it's based on how much stress the plant can handle while...
Frequently asked questions
Got questions about keeping your plumbago plant lush and blooming? Here are some of the most common ones—and their answers!
When is the best time to prune my plumbago plant?
Prune your plumbago twice a year: early spring (just before new growth) to shape the plant and remove dead wood, and late summer or early fall to encourage another round of blooms. Avoid pruning in winter, as the plant may be dormant.
How much should I cut back my plumbago during pruning?
For light shaping, trim back about 1/3 of the plant’s height to encourage bushier growth. If your plumbago is overgrown or leggy, you can cut it back by half—it’ll bounce back with vibrant new growth! Just avoid over-pruning, which can stress the plant.
What should I do if my plumbago isn’t blooming after pruning?
If your plumbago skips blooms, check these fixes:
- Light check: Ensure it gets 6+ hours of sunlight daily—plumbago thrives in full sun.
- Fertilizer: Use a balanced, bloom-boosting fertilizer (like 10-10-10) every 4-6 weeks during growing season.
- Deadheading: Remove spent flowers regularly to encourage new blooms.
Can I propagate my plumbago from pruned cuttings?
Plumbago cuttings root easily—just take 4-6 inch healthy stems, strip the lower leaves, dip in rooting hormone (optional), and plant in moist potting mix. Keep them humid and warm (65-75°F) until roots form (~3-4 weeks). Perfect for spreading your favorite variety!
Do I need to prune plumbago in winter?
Only if frost damage occurs! In mild climates, a light trim to remove dead or frozen stems is fine. In colder zones, wait until spring—plumbago is semi-evergreen and can handle winter dormancy with minimal pruning.
Wrapping up and next steps
Pruning your plumbago plant isn’t just about keeping it tidy—it’s the secret to vibrant, year-round blooms and a healthier plant! 🌸 By mastering the right techniques for seasonal trimming, deadheading, and shaping, you’ll encourage lush growth and stunning flowers.
Whether you’re a beginner or a seasoned gardener, a little precision goes a long way.
Ready to transform your plumbago into a showstopper? Grab your pruners, follow the steps you’ve learned, and watch your garden thrive. Next, why not explore companion plants or soil care tips to give your plumbago the perfect environment to flourish? Happy gardening! 🌿