Pruning
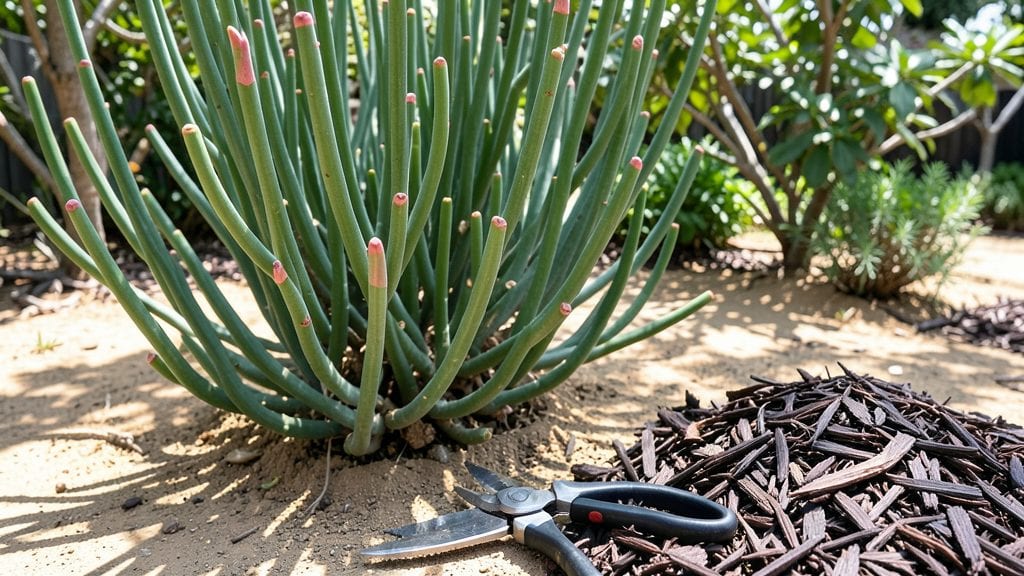
Pruning euphorbia plants isn't just about shaping—it's about unlocking their full potential while keeping you safe from their irritating sap. 🌱 I learned the hard way that skipping gloves and sharp shears leads to messy mistakes, but the right approach turns leggy stems into dense, vibrant growth that lasts all year.
The key is timing: prune right after flowering or in early spring before new growth kicks in. You'll need heavy-duty gloves, pruning shears, and a bit of patience—euphorbia sap dries clear but causes skin irritation if it touches broken skin.
A quick wipe with rubbing alcohol after trimming keeps things clean and safe.
What you end up with is a plant that looks fuller, grows faster, and produces more flowers. The secret is cutting back by one-third each time, always just above a leaf node. Within weeks, you'll see fresh green shoots popping up where bare stems used to be.
Works for all euphorbia types, from towering candelabras to trailing varieties. Just remember: always let the sap dry completely before repotting or composting cuttings. Here's how to do it right the first time.
📚 In This Guide
- What you need
- Instructions
- Tips and common mistakes
- Wrapping up and next steps
What you need
- ● Pruning shears: Bypass pruners (sharp, clean, and sterilized) for clean cuts on stems up to ½ inch thick.
- ● Garden gloves: Heavy-duty, chemical-resistant gloves (latex or nitrile) to protect against milky sap.
- ● Disposable gloves: Extra pair for handling sap (latex-free if sensitive).
- ● Rubbing alcohol (70% or higher) or hydrogen peroxide: For sterilizing tools and cleaning sap spills.
- ● Newspaper or cardboard: To lay down and catch sap drips during pruning.
- ● Small trash bag or bucket: For disposing of cuttings and debris.
- ● Hand sanitizer or soap: To wash hands after handling sap.
- ● Rooting hormone: For propagating cuttings (gel or powder form).
- ● Potting mix: Well-draining cactus/succulent mix if repotting cuttings.
- ● Safety goggles: If working with large, thorny varieties like Euphorbia tirucalli.
- ● Labeling tags: For marking propagated cuttings if you plan to grow new plants.
Step-by-Step guide to pruning euphorbia plants
Euphorbias thrive with strategic cuts—here's how to keep them lush without risking sap damage.
✂️ Step 1: Gather Tools and Safety Gear
Euphorbia sap is milky and irritating, so I always wear gloves and long sleeves before handling. Grab your sterilized pruning shears—clean blades prevent disease spread. I like to wipe them down with rubbing alcohol between cuts for extra protection. Work on a dry day to avoid sap splattering in wet conditions.
This is the moment that matters: never prune when plants are wet. The sap sticks to leaves and can cause burns on your skin. If you accidentally get sap on exposed areas, wash immediately with warm, soapy water. Keep a small container of mild dish soap nearby as a precaution.
✂️ Step 2: Identify Dead or Damaged Growth
Start by scanning your euphorbia for brown, brittle stems or leaves with yellowing edges—these are your first targets. I always remove dead growth first because it drains energy from healthy parts. Use your shears to make clean cuts at a 45-degree angle, about ¼ inch above a leaf node or where the stem meets a healthy branch.
Watch for pale, mushy stems—these signal rot. Cut these out completely, even if it means removing an entire branch. Healthy euphorbia stems feel firm and green. If you're unsure, gently squeeze the stem: it should spring back instead of collapsing under pressure.
✂️ Step 3: Shape for Fullness and Airflow
Euphorbias grow best with good airflow, so I thin out crowded branches to let light reach the center. Look for overlapping leaves or branches rubbing together—these are prime spots for fungal issues. Trim back the longest stems by ⅓ of their length to encourage bushier growth. Always cut just above a leaf node where new growth can sprout.
Here's the thing—euphorbias respond well to shaping, but don't go overboard. You'll see new shoots emerge within 2-3 weeks if you've pruned at the right spots. If you cut too aggressively, the plant may take longer to recover. I usually prune in early spring, right as new growth begins.
✂️ Step 4: Clean Up and Dispose of Clippings
After trimming, wipe down your shears again with rubbing alcohol to prevent cross-contamination. Euphorbia clippings contain irritating sap, so I double-bag them in plastic and toss them in the trash—never compost. The sap can leach into soil and harm other plants.
Give your euphorbia a light watering after pruning to help it recover. You'll notice fresh, vibrant growth within 4-6 weeks if you've followed the right cuts. Avoid fertilizing immediately—wait until new growth appears to prevent burning tender stems.
☀️ Step 5: Monitor and Adjust Light Exposure
After pruning, euphorbias often need more light to compensate for lost foliage. Move your plant to a bright, indirect spot for a few days to help it adjust. If you notice new growth stretching toward the light (called "etiolation"), it's time to give it more direct sunlight gradually.
Real talk: euphorbias are tough, but they won't forgive neglect after pruning. Keep an eye out for yellowing leaves or wilting—these are signs of overwatering or stress. Reduce watering slightly until the plant stabilizes. With proper care, your euphorbia will reward you with dense, vibrant growth all year.
Tips & tricks for pruning euphorbia plants
These simple tricks will help you transform your euphorbia from a neglected corner plant to a thriving centerpiece—without the stress.
Safety First: I can't stress this enough—euphorbia sap is no joke. Beyond gloves and long sleeves, I keep a small bottle of rubbing alcohol handy to wipe down my shears between cuts. This prevents sap buildup that can actually dull your blades over time. Also, work outside or in a well-ventilated area if possible—the sap can irritate your eyes and lungs too.
The 45-Degree Angle Secret: When making those clean cuts in Step 2, the 45-degree angle isn't just for looks—it prevents water from pooling in the cut. Water pooling leads to rot, which is exactly what you're trying to avoid. Think of it like creating a little roof over each cut to keep moisture out. This simple technique makes all the difference in preventing those mushy stems you want to avoid.
Timing is Everything: The 2-3 week window mentioned for new growth is your best friend. If you don't see new shoots emerging within this timeframe, don't panic—just check your cuts. You should always be cutting just above a leaf node (that little bump where leaves grow out). If you missed the node, the plant won't know where to send new growth. I've made this mistake too many times—always double-check your cuts!
Light Exposure Hack: After pruning, that bright indirect spot recommendation is crucial for the first few days. I like to place my euphorbias near an east-facing window where they get gentle morning light. This helps them recover without getting sunburned, which can happen when you suddenly expose them to direct sunlight after a trim. Think of it as plant physical therapy—gentle and gradual is best.
Pro Tips for Pruning Euphorbia Plants
- These simple tricks will help you transform your euphorbia from a neglected corner plant to a thriving centerpiece—without the stress.
- Safety First: I can't stress this enough—euphorbia sap is no joke.
- The 45-Degree Angle Secret: When making those clean cuts in Step 2, the 45-degree angle isn't just for looks—it prevents water from pooling in the cut.
Frequently asked questions
Got questions about pruning your euphorbia plants? You’re not alone! Here are some common concerns—and clear, practical answers to keep your plants thriving.
When is the best time to prune euphorbia?
Prune euphorbia in early spring (just before new growth starts) or late summer (after flowering). Avoid pruning in winter or during extreme heat—these plants need time to recover. For tropical varieties, prune lightly year-round to maintain shape, but wait until after blooming for seasonal types.
Do I need special tools to prune euphorbia?
Yes! Use sterilized pruning shears or sharp bypass pruners to avoid crushing stems. Wear gloves—euphorbia sap can irritate skin—and have latex-free wipes handy for cleanup. A dust mask helps if cutting dried foliage (which releases fine particles).
What if I cut too much off my euphorbia?
Don’t panic! Euphorbias are highly resilient. If you over-prune, focus on watering consistently (but don’t overwater) and fertilize lightly with a balanced 10-10-10 mix to encourage regrowth. Avoid pruning again for 4–6 weeks—let the plant recover. Most varieties bounce back within a season!
Can I propagate euphorbia from pruned cuttings?
Stem cuttings
root easily in sandy soil or perlite. Let cuttings dry for 1–2 hours to seal the sap, then plant in a well-draining mix. Keep soil slightly moist (not soggy) and place in bright, indirect light. Roots form in 2–4 weeks—perfect for expanding your collection!
Why is my euphorbia leaking white sap after pruning?
That’s latex sap, a natural defense mechanism. It’s not harmful but can irritate skin or eyes. Wear gloves and wash tools with soapy water after pruning. The sap hardens quickly—just wipe it away with a damp cloth. If sap oozes heavily, your plant may be stressed; check for overwatering or pests.
How often should I prune euphorbia for bushier growth?
For compact, bushy euphorbias (like Euphorbia milii), prune every 6–8 weeks to encourage branching. Pinch back new growth tips to stimulate side shoots. For tall varieties (like Euphorbia tirucalli), a single annual prune in spring suffices—over-pruning can weaken the plant.
Wrapping up and next steps
Pruning your euphorbia plants doesn’t have to be intimidating—with the right tools, timing, and techniques, you can encourage lush, healthy growth all year long! Remember to wear gloves, work in well-ventilated areas, and always let the sap dry before handling.
Whether you’re shaping a spiky succulent or promoting bushier foliage, a little care goes a long way.
Now that you’re equipped with the know-how, grab those shears and get pruning! Observe your plants regularly—you’ll soon notice the difference in their vibrancy and resilience. Happy gardening! 🌱✨