Picking
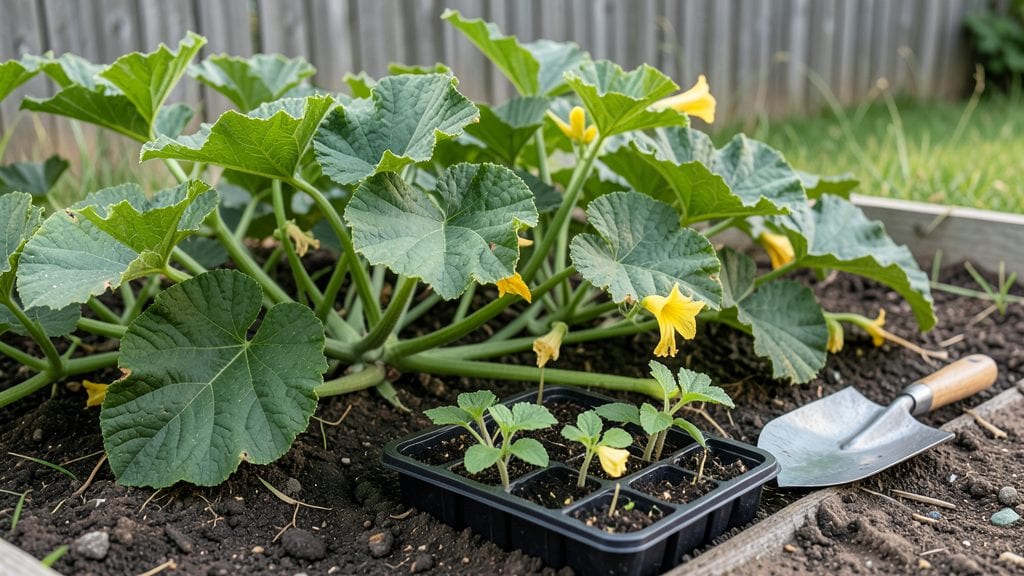
Planting hubbard squash in rich, well-drained soil is the first step to harvesting those iconic blue-green fruits with their sweet, nutty flavor. 🌱 I’ve learned that the difference between a few small squash and a bountiful harvest often comes down to how you prep the bed—think deep, loose soil mixed with compost, and a spot that gets full sun all day.
The key isn’t just planting; it’s creating the perfect environment for these heavy feeders to thrive from the start.
You’ll need warm soil temperatures—at least 60°F—before planting, which usually means waiting until after the last frost in your zone. Start seeds indoors 4-6 weeks before transplanting, or buy sturdy seedlings from a nursery.
Space them 4-5 feet apart in rows that run north-south to maximize sunlight, and plant them just 1-2 inches deep. Hubbard squash roots are sensitive, so avoid disturbing them once they’re in the ground.
What you’ll end up with is a garden corner that becomes the talk of the neighborhood—imagine the excitement when those first 10-pound monsters start showing up in late summer.
The secret to consistent yields is keeping the soil moist but not soggy, mulching heavily to retain moisture, and watching for squash vine borers early in the season. With the right care, you could be harvesting 5-10 squash per plant by fall.
This method works best in zones 4-10, though early varieties can handle cooler climates if you use black plastic mulch to warm the soil. For smaller spaces, try container growing with large pots—just be ready to support the vines as they sprawl.
The payoff? Fresh hubbard squash that outshines anything you’ll find at the store, and the satisfaction of growing something truly impressive.
📚 In This Guide
- What you need
- Instructions
- Tips and common mistakes
- Wrapping up and next steps
What you need
- ● Hubbard squash seeds: 3–5 seeds per plant (start with 5–10 seeds if testing varieties). Opt for heirloom or hybrid seeds like Blue Hubbard or Delicious for best results.
- ● Garden space: Full sun (6–8+ hours daily) and well-draining soil. Hubbard squash needs 50–75 sq. ft. per plant—they’re big!
- ● Compost or aged manure: 2–3 cups per planting hole to enrich soil with nitrogen and potassium.
- ● Mulch (straw or shredded leaves): 2–3 inches thick to retain moisture and suppress weeds.
- ● Garden trowel or transplanting spade
- ● Watering can or hose with adjustable nozzle (gentle spray setting)
- ● Row cover or lightweight fabric (to protect young plants from pests)
- ● Pruning shears (for harvesting and trimming vines)
- ● Garden gloves (to keep hands clean while handling prickly vines!)
- ● Last frost date: Plant seeds 2–3 weeks after the last frost in spring (Hubbard squash is frost-sensitive!).
- ● Soil temperature: Aim for 60–70°F (15–21°C)—use a soil thermometer if unsure.
- ● pH level: Test soil pH (ideal range: 6.0–7.0). Amend with lime or sulfur if needed.
Step-by-Step instructions for planting hubbard squash
Here's how to grow robust, high-yielding hubbard squash plants that produce those iconic, nutritious winter squashes.
🌱 Step 1: Choose and Prepare the Planting Site
Hubbard squash thrives in full sun and warm soil, so select a location that receives at least 8 hours of direct sunlight daily. I always test the soil temperature with a soil thermometer—it needs to be at least 65°F before planting, which usually means waiting until after the last frost date in your area.
Work in 3-4 inches of compost to improve drainage and fertility, since hubbard squash is heavy-feeding. Avoid planting in the same spot where other squash family members (like pumpkins or zucchini) grew last year to prevent disease buildup. The ideal soil pH is between 6.0 and 7.0—test your soil if you're unsure.
🌱 Step 2: Start Seeds Indoors or Direct-Sow After Warmth
For a head start, I sow seeds indoors 4-6 weeks before the last frost date using 2-inch deep biodegradable pots. Plant seeds 1 inch deep in a mix of 50% potting soil and 50% perlite to prevent damping-off. Keep the soil consistently moist at 75-85°F until germination, which typically occurs in 7-14 days.
If your climate stays warm early, you can direct-sow seeds after the soil reaches 65°F. I like to plant 3-4 seeds per hill, spacing hills 3-4 feet apart in rows that are 6 feet apart. This gives the sprawling vines plenty of room to establish without competing for nutrients.
☀️ Step 3: Transplant or Thin Seedlings Carefully
When transplanting indoor-started seedlings, harden them off for 7-10 days before moving them outside. Choose an overcast day to minimize transplant shock. Bury the stem slightly deeper than it was in the pot—this encourages stronger root growth. I always thin seedlings to the strongest plant per hill, removing weaker ones at the base with clean shears.
For direct-sown seeds, thin to 2-3 strong plants per hill once the first true leaves appear. Leave the strongest seedling with the most vigorous stem color and leaf structure. Mulch around the base with 2-3 inches of straw to retain moisture and prevent soil-borne diseases from splashing onto leaves.
💧 Step 4: Water and Fertilize for Maximum Growth
Hubbard squash needs 1-2 inches of water per week, delivered at the soil level to avoid wetting the leaves. I water deeply in the morning to allow foliage to dry before evening, which reduces the risk of powdery mildew. Use a soaker hose or drip irrigation to keep moisture consistent—uneven watering causes bitter fruit and poor yields.
Feed plants with a balanced organic fertilizer (10-10-10) at planting, then again when vines begin to sprawl. Side-dress with compost tea every 3 weeks to provide micronutrients. You'll see vigorous vine growth and larger leaves within 2-3 weeks of consistent feeding.
✂️ Step 5: Train Vines and Harvest at Peak Ripeness
Gently guide vines onto a trellis or spread them out on the ground, ensuring they don't compete with other plants. Prune any suckers (side shoots) that form in the leaf axils to direct energy toward fruit production. I also remove any male flowers that appear early in the season—they drain energy that could go toward female flowers and fruit development.
Harvest hubbard squash when the skin turns hard and the stem dries out, typically 85-100 days after planting. Use a sharp knife to cut the fruit from the vine, leaving 1-2 inches of stem attached. Cure harvested squash in a warm, dry place (80-85°F) for 10 days to develop flavor and storage life. Store in a cool (50-55°F), dark place for up to 6 months.
Tips & tricks for perfect hubbard squash planting
A few strategic adjustments can transform your hubbard squash from decent to exceptional. These battle-tested tips will help you navigate the quirks of growing this heavy-feeder while maximizing your yield.
Soil Temperature is Non-Negotiable: That 65°F soil temperature threshold in Step 1 is critical—cold soil slows germination and stunts root development. I've seen seeds fail to sprout when planted in soil just 10°F cooler than ideal. Use a soil thermometer for accuracy, and consider using black plastic mulch a few days before planting to warm the soil faster. This is especially important in cooler climates where spring arrives slowly.
Indoor Starting Secrets: When starting seeds indoors 4-6 weeks before the last frost, I've found that using a heat mat set to 75-85°F dramatically speeds up germination from 14 days to just 5-7 days. The key is maintaining consistent warmth—fluctuations cause erratic sprouting. Once seedlings have their first true leaves, move them to a sunny window or under grow lights for 12-14 hours daily to prevent leggy growth before transplanting.
Transplanting Timing Matters: The 7-10 day hardening off period in Step 3 is where many growers cut corners—and pay for it later. I recommend starting this process 10 days out rather than 7, especially if your evenings are still chilly. Harden off gradually by moving plants to outdoor shade for progressively longer periods each day. This toughens seedlings so they can handle the full sun and temperature swings after transplanting.
Watering Strategy for Heavy Feeders: Hubbard squash has an insatiable thirst, but the 1-2 inches per week guideline in Step 4 needs context. In my experience, newly transplanted plants need 1-1.5 inches weekly until vines establish, then increase to 2 inches weekly during flowering and fruiting. The secret is watering at the base using a soaker hose—this prevents powdery mildew by keeping foliage dry while delivering moisture exactly where the roots need it most.
Pro Tips for Planting Hubbard Squash
- A few strategic adjustments can transform your hubbard squash from decent to exceptional.
- Soil Temperature is Non-Negotiable: That 65°F soil temperature threshold in Step 1 is critical—cold soil slows germination and stunts root development.
- Indoor Starting Secrets: When starting seeds indoors 4-6 weeks before the last frost, I've found that using a heat mat set to 75-85°F dramatically speeds up germination from 14 days to just 5-7 days.
Frequently asked questions
Got questions about growing Hubbard squash? You’re not alone! Here are answers to the most common concerns to help you plant with confidence.
When is the best time to plant Hubbard squash?
Hubbard squash thrives in warm soil—plant seeds after the last frost when temperatures consistently stay above 60°F (15°C). For most regions, this means late spring to early summer. If your growing season is short, opt for transplants instead of seeds for a head start!
How long does it take for Hubbard squash to mature?
From seed to harvest, Hubbard squash takes 85–100 days, depending on the variety. Keep an eye on the rind—when it turns hard and dull (not shiny), it’s ready to pick. Pro tip: Use a sharp knife to test firmness; if it doesn’t yield, it’s time to harvest!
Can I grow Hubbard squash in containers?
Yes! Hubbard squash can thrive in large containers (at least 5 gallons) with good drainage. Choose a variety like ‘Long Island Cheese’ for smaller spaces. Ensure the container gets full sun (6–8 hours/day) and use a lightweight potting mix. Warning: Vines can sprawl—train them or use a trellis if space is tight!
What pests should I watch for, and how do I prevent them?
Common pests include squash bugs, cucumber beetles, and powdery mildew. Prevent issues by:
- Using row covers early in the season.
- Hand-picking pests (drop them in soapy water!).
- Watering at the base of plants to avoid fungal diseases.
- Rotating crops yearly to break pest cycles.
What can I do if my Hubbard squash flowers but doesn’t produce fruit?
If flowers appear but no squash forms, check for:
- Lack of pollinators (hand-pollinate with a paintbrush if bees are scarce).
- Temperature stress (Hubbards need warm days and cool nights for fruit set).
- Over-fertilizing with nitrogen (too much greens = fewer fruits; balance with phosphorus).
Try thinning excess flowers to encourage larger squash development.
Wrapping up and next steps
Growing Hubbard squash is a rewarding journey that yields delicious, nutrient-packed harvests with the right care! 🌱 By choosing the perfect variety, preparing your soil, and following pro tips for planting, watering, and pest control, you’ll be well on your way to a bountiful garden.
Whether you’re a seasoned gardener or just starting, every step counts—so grab your gloves and get ready to enjoy the fruits of your labor!
Your next step? Mark your calendar for harvest season and start planning your first Hubbard squash dish—maybe a hearty soup or a sweet roasted treat! 🍲 The garden (and your taste buds) will thank you.