Transplanting
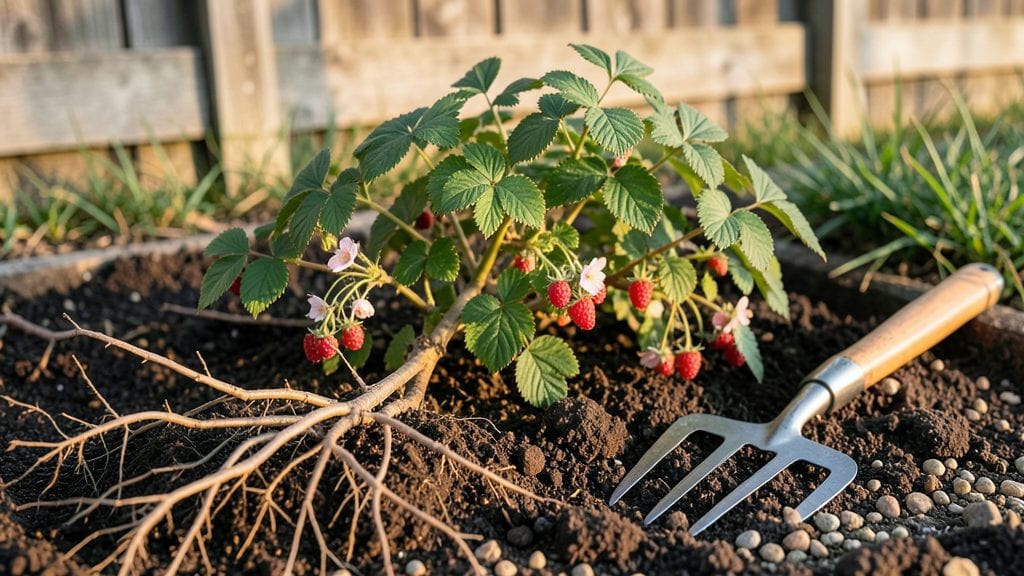
Planting Willamette raspberries in your Pacific Northwest garden means juicy, disease-resistant berries that thrive where others fail. ✨ I’ve grown these for five years now, and the secret isn’t just the variety—it’s matching the planting to the damp, cool climate that makes Willamettes shine.
Start with healthy bare-root plants or well-established potted vines, and choose a site with morning sun and afternoon shade—critical for preventing mildew in our humid summers.
Amend heavy clay soil with compost to improve drainage, and space plants 3-4 feet apart in rows 6 feet apart to allow airflow and easy harvests. Plant crowns just above soil level to prevent rot, then water deeply to settle the roots.
Your first harvest will arrive in late summer, but patience pays off—these vines reward careful pruning now with years of productive growth. Cut back last year’s canes to the ground in early spring, leaving only the new, vigorous shoots.
Mulch heavily to retain moisture and keep roots cool, a must in our wet winters and dry spells.
Willamettes handle Pacific Northwest weather better than most varieties, but watch for cane blight in damp springs and spider mites in dry summers. A 3-inch layer of straw mulch keeps berries clean and deters pests naturally.
With these steps, you’ll go from bare soil to a thriving raspberry patch that outproduces store-bought berries every season.
📚 In This Guide
- What you need
- Instructions
- Tips and common mistakes
- Wrapping up and next steps
What you need
- ● Willamette raspberry plants: 3–5 bare-root or potted plants (ensure they’re disease-resistant and certified for your region).
- ● Soil: Well-draining, slightly acidic loam (pH 5.5–6.5). Mix in compost or aged manure (5–10 gallons per plant) for fertility.
- ● Fertilizer: Balanced organic fertilizer (10-10-10 or 5-10-10 NPK ratio) or fish emulsion (follow package rates).
- ● Mulch: 2–3 inches of straw, wood chips, or pine needles to retain moisture and suppress weeds.
- ● Support system: T-trellis: 6–8 ft tall (for primocanes) + 4–6 ft for floricanes, or
- ● Wire fence: 6 ft high with horizontal wires every 12 inches.
- ● Pruners: Sharp, disease-free bypass pruners (sterilize with rubbing alcohol between cuts).
- ● Garden gloves: Heavy-duty for thorn protection.
- ● Watering system: Drip irrigation or soaker hoses (avoid overhead watering to prevent disease).
- ● Soil test kit: To fine-tune pH and nutrient levels.
- ● Row cover: Lightweight fabric to protect young plants from pests or late frosts.
- ● Epsom salt: (1 tbsp per plant) for magnesium boost in early growth.
- ● Compost tea: For a microbial soil boost (especially in clay-heavy PNW soil).
- ● Bird netting: If wildlife loves your berries as much as you do!
Step-by-step instructions for planting Willamette raspberries
Here’s how I’ve perfected planting these Pacific Northwest favorites—hardy, productive, and built to thrive in your climate.
🌱 Step 1: Select the Perfect Site and Prepare the Soil
Willamette raspberries demand full sun—at least 6-8 hours daily—and well-draining soil. I always pick a spot with morning sun and afternoon shade to prevent leaf scorch, especially in hotter summer months. Avoid low-lying areas where cold air pools, as these vines are sensitive to frost damage.
Test your soil’s pH—Willamette raspberries prefer slightly acidic to neutral (6.0-7.0). If your soil is heavy clay or sandy, amend it with 2-3 inches of compost mixed into the top 12 inches of soil. I swear by a 50/50 blend of native soil and compost for the best root establishment. Loosen the soil to a depth of 12 inches with a broadfork or tiller to encourage deep root growth.
🪴 Step 2: Plant Bare-Root Canes at the Right Depth and Spacing
Plant your 4 bare-root canes (as specified in your materials) 2-3 feet apart in a trench 12-18 inches wide and 12 inches deep. Space rows 6 feet apart to allow for future canes and easy maintenance. This spacing prevents overcrowding, which invites disease and reduces fruit quality.
Soak the bare roots in lukewarm water for 1 hour before planting to revive them. Position each cane so the crown (where roots meet stem) sits just 1 inch below soil level—burying it too deep suffocates the plant, while planting too shallow exposes it to drying winds. Backfill with soil, firming gently around the roots to eliminate air pockets.
💧 Step 3: Water Deeply and Mulch for Moisture Retention
Water deeply right after planting—soak the soil until it’s saturated 12 inches down. Willamette raspberries establish roots slowly, so consistent moisture is critical in the first 4-6 weeks. I use a soaker hose to deliver water slowly at the base, avoiding wetting the leaves to prevent fungal issues.
Apply a 3-inch layer of organic mulch (like straw or wood chips) around the base, keeping it 6 inches away from the crown to prevent rot. Mulch conserves moisture, suppresses weeds, and regulates soil temperature. Replenish mulch annually in early spring to maintain its protective layer.
✂️ Step 4: Prune and Train Canes for Maximum Yield
In their first year, remove any flowers that form—this redirects energy to root and cane development. Let the canes grow freely but tie them to a trellis or support wires as they reach 4-5 feet tall. Willamette raspberries produce fruit on floricanes (second-year canes), so pruning in early spring is key.
Come late winter, cut back all old canes to the ground. Leave only the new, vigorous canes (primocanes) that emerged last summer. Thin these to 6-8 of the strongest canes per plant, spacing them evenly. This ensures air circulation and prevents disease. I always sterilize my pruners with rubbing alcohol between cuts to avoid spreading pathogens.
☀️ Step 5: Monitor for Pests and Fertilize for Long-Term Health
Willamette raspberries are relatively pest-resistant, but watch for spotted wing drosophila and Japanese beetles—common in the PNW. I handpick beetles and use row covers for early fruit to deter fruit flies. Apply neem oil as a preventive spray if you spot early signs of infestation.
Fertilize lightly in early spring with a balanced 10-10-10 formula, using ½ cup per plant. Avoid high-nitrogen fertilizers, which promote leafy growth at the expense of fruit. Instead, focus on potassium-rich amendments (like banana peels or wood ash) to boost flavor and disease resistance. Water deeply after fertilizing to prevent root burn.
Tips & tricks for perfect Willamette raspberry planting
Planting Willamette raspberries isn't just about following steps—it's about creating the ideal conditions for these Pacific Northwest powerhouses to thrive. Here's what I've learned from years of growing these reliable vines.
Site Selection Secrets: The 6-8 hours of daily sun requirement is non-negotiable, but I've found that positioning your plants with morning sun and afternoon shade in summer prevents leaf scorch without sacrificing fruit production. In cooler PNW summers, you can actually extend morning sun exposure to 8 hours—just monitor for any signs of stress on the leaves. The key is avoiding those hot afternoon rays that can cook the foliage while still getting plenty of light for photosynthesis.
Root Revival Technique: That 1-hour soak for bare roots before planting is crucial, but don't just dunk them in water—use lukewarm water and make sure the roots are fully submerged. I've found adding a tablespoon of seaweed extract to the soaking water gives the roots a little extra boost. After soaking, gently shake off excess water before planting to prevent waterlogging around the roots.
Soil Preparation Pro Tip: When amending your soil with that 50/50 blend of native soil and compost, don't just mix it superficially. Use a broadfork to create channels 12 inches deep where the roots can penetrate easily. I've seen plants struggle when the amended soil is just a thin layer on top—those deep channels make all the difference for root establishment.
Mulching Mastery: That 3-inch layer of organic mulch should be applied after the soil has settled slightly post-planting. I've found wood chips work best for moisture retention, but straw is excellent for weed suppression. The critical detail is keeping that mulch 6 inches away from the crown—too close and you risk rot from trapped moisture. Replenish annually in early spring before new growth begins.
Pro Tips for Willamette Raspberry Planting
- Planting Willamette raspberries isn't just about following steps—it's about creating the ideal conditions for these Pacific Northwest powerhouses to thrive.
- In cooler PNW summers, you can actually extend morning sun exposure to 8 hours—just monitor for any signs of stress on the leaves.
- Root Revival Technique: That 1-hour soak for bare roots before planting is crucial, but don't just dunk them in water—use lukewarm water and make sure the roots are fully submerged.
Frequently asked questions
Got questions about planting Willamette raspberries?
Here are answers to the most common ones—so you can grow like a pro!
When is the best time to plant Willamette raspberries in the Pacific Northwest?
Plant in early spring (March–April) or fall (September–October) for ideal root establishment. Avoid extreme heat or frost—Willamettes thrive in cool, moist climates. Pro tip: Bare-root plants love soil temps between 40–60°F (4–15°C).
How long does it take for Willamette raspberries to bear fruit?
Patience pays off! Primocanes (first-year canes) won’t fruit—save those for next year. Fruiting happens on floricanes (second-year canes) in 2 years. With proper care, expect heavy harvests by Year 3.
Why aren’t my Willamette raspberry canes producing fruit?
Common culprits:
- Improper pruning—Remove old canes after harvest (not before).
- Nutrient deficiency—Test soil; add compost or balanced fertilizer (10-10-10).
- Pests/disease—Check for spider mites or fungal spots. Spray neem oil if needed.
Can I grow Willamette raspberries in containers?
Yes! Use a 5-gallon+ pot with drainage holes and well-draining soil. Dwarf varieties (like ‘Heritage’) adapt best. Place in full sun, water deeply 2–3x/week, and fertilize monthly. Warning: Containers dry faster—monitor soil moisture!
What’s the best companion plant for Willamette raspberries?
Pair with herbs (mint, thyme), flowers (marigolds, nasturtiums), or vegetables (lettuce, spinach) to deter pests. Avoid: Potatoes, tomatoes, or peppers (they compete for nutrients). Bonus: Comfrey boosts soil fertility!
Do Willamette raspberries need winter protection?
Mulch heavily (4–6 inches) with straw or leaves to insulate roots. Young plants may need burlap wraps in harsh winters. Prune in late winter (before buds swell) to prep for spring growth.
Wrapping up and next steps
Planting Willamette raspberries in your Pacific Northwest garden is a rewarding adventure that blends resilience with delicious results! 🌱 With the right soil prep, spacing, and care, you’ll soon enjoy bountiful harvests of sweet, flavorful berries—perfect for jams, snacks, or fresh eating.
Whether you’re a seasoned gardener or a curious beginner, these vines thrive with just a little patience and precision.
Now that you’re armed with the know-how, roll up your sleeves and get planting! Start by marking your plot, then follow the steps to give your raspberries the best possible start. Before you know it, you’ll be savoring homegrown Willamettes—the taste of the PNW at your fingertips.